
Technology lessons for educational technology integration in the classroom. Content for teachers and students.
Publishing Google Charts with Google Docs
Welcome to the second part of a four-part lesson on publishing Google Charts. This lesson focuses on the publication of charts using Google Docs.
In the previous lesson, we learned how to publish charts with Google Sheets. We published a Chart by itself. We also published charts and tables in a dashboard format.

Introduction
Welcome to the second part of a four-part lesson on publishing Google Charts. This lesson focuses on the publication of charts using Google Docs.
In the previous lesson, we learned how to publish charts with Google Sheets. We published a Chart by itself. We also published charts and tables in a dashboard format.
Publishing charts in Docs provides a variety of tools not available in Sheets; this is useful when we want students to include Charts in reports.
Use the link below to see a preview of the final document.
Use the links below to get a copy of the working document for this lesson.
The link below contains the Google Doc to be published.
The link below contains the Google Sheet with the chart to be published.
Google Sheets working document
The document has information about Denali and Mount Blackburn. I copied the information from Wikipedia. The links to the resources are available in the citations.
Insert the chart
Place the cursor above the heading for Mountain Peaks.

Go to the menu and click Insert. Go to the Chart option and select From Sheets.

Find the Highest mountain peak spreadsheet; click on it once. Click the Select button.

A chart selection box opens. We only have one chart. Click on the chart and then the Import button.

There are two ways of publishing this document. I prefer one over the other. I think you will see why one is better than the other. Click File in the menu and select Publish to the web.

Click the Publish button. Get the link and paste it into a new tab. The published document looks good; however, all our nice formatting is gone. Let's take a look at another option.

Leave the published document tab open. Return to the document and close the publication configuration box.
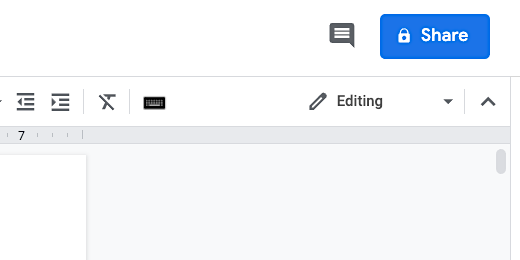
Click the Share button.

Click the option to change the link so anyone who has the link can view the document.

Click the copy link button.

Open a new tab and paste the link. Look for the word edit at the end of the shared link.

Replace edit and anything after with the word —preview. Press the Return key.
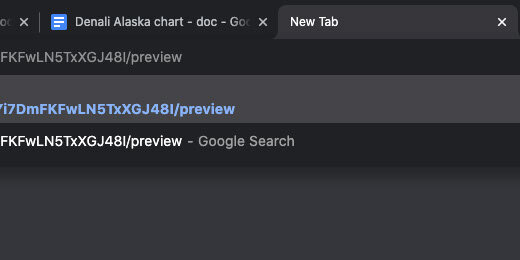
This published version retains all the formatting. I prefer this way of publishing the Google Document.

This version comes with drawbacks. A shared version is different from a published version. The link on a shared version can be modified to allow anyone to make a copy of the document. They can replace the word preview with the word —copy. This is how you have been getting the working documents for the lessons.
Update the chart
Updating the chart information is not automatic. Go to the spreadsheet. Click on the Heading for Peak. Go to the Formula bar and change the limit from 10 to 5.


Go to the working document. Not the one published with the preview link. Click once on the chart. There is an update button in the top right corner. Click the button to update the published chart.

Go to the published document tab. Refresh the document page.

Text in a Google Doc is different. The text in the document is automatically updated.
Geometry assignment document
In this lesson, you will create an assignment document for geometry assignments. The assignment document uses the geometry images created in other lessons. The images are free and available from my Teacher Pay Teacher storefront.

Introduction
In previous lessons, we learned to create a variety of geometric shapes and angles. In this lesson, we are going to bring them all together to provide assignments for students. The links to the shape and angle lessons are available below. A preview of the final product is also available.
Basic Geometric Shapes with Google Drawings
Preview and copy of the final product.
Area and perimeter
Open Google Drive and create a folder for the geometry assignments. Create a Google Document. Set the name of the document to Geometry Assignment Template. Go to the menu and click File. Select the Page Setup option.

Set the page size to Legal. Change all the margins to .5 inches. Click the Ok button. The legal size page format provides more space for the shapes. We can also use the A4 format.

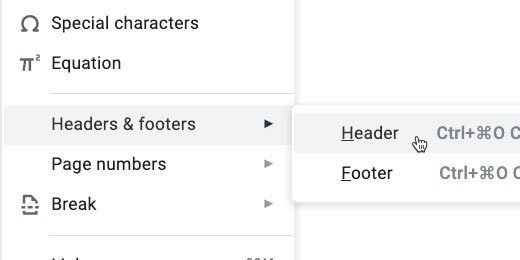
Go to the menu again and click Insert. Go to the Headers & footers option. Select Header.
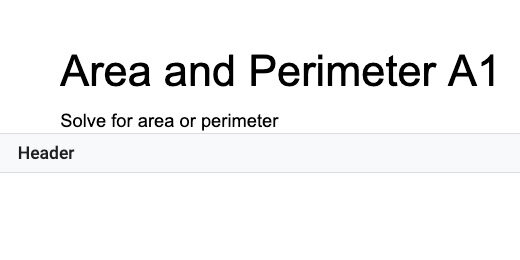
Set a title for the assignments. Provide instructions for students. I used the Title paragraph style for the assignment title. I have a coding scheme that helps me keep track of my assignments. Assignments begin with the Letter A. The letter is followed by the number of the assignment. I use Q for quizzes and T for tests. I use this information in my grade book.
This is a placeholder title. Replace it with each new assignment.
Click once in the document body. Press the Return key once. Click Insert and go to the Table option. Create a table with four columns and two rows.

The first column is used to number the problems. Type the number 1 and a closing parenthesis. Move the table column table border on the right. Move it close to the number but don't crowd it. The column needs to be wide enough to accommodate two-digit numbers.

We are going to adjust the column for the shapes. Go to the ruler. Find the column marker. It is next to the right indent marker.

Move the column marker to 2.5 inches.

Select the last two columns in the first row.

Click Format and go to the Table option. Select the option to distribute the columns.

Select the two rows in the second column.

Use Format to get to the Table option. Choose Merge cells.

Select the last two columns in the first row and merge them. This is the basic format for our geometry assignment template.

Go to the menu and click Format. Go to the table option. Select table properties.

Change the table border width to .5 points. Change the minimum row height to 2.

Click the border color selector. Select dark gray 1. Click the OK button to save the changes.

This is our basic template.

Select all the cells in the table. Click Edit and select Copy.

Click once below the table. Paste the contents.

Paste the table three more times. The fifth table is added to a second page. Keep pasting the table until there are 10. Change the numbers in each table to match the table count.

We have three pages with templates for geometry problems. The instructions from the heading are very close to the first table on each page. Double click inside the Header. Go to the end of the instructions and press the Return key once.

Using the template
The basic template is ready. I’ve shown how to do the next step in a previous lesson. The link to the lesson is available below.
Create a Template folder in the Bookmarks bar for the next step.
Go to the Chrome browser address bar.
Erase Edit# and replace it with template/preview.

Go to the beginning of the document link. Click the Lock icon and drag it to the address bar.

Drop the icon over the Template folder. Make sure to wait for the folder to highlight before releasing it.

Click the folder and select the geometry assignment template.

Click the Use Template button.
The assignment
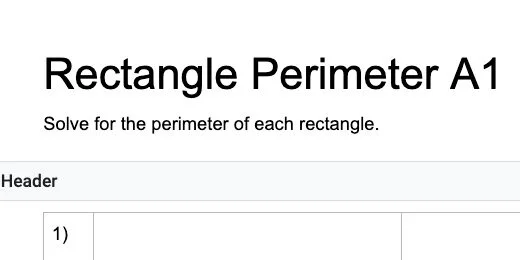
Change the name of the document. This document's name is Geometry Perimeter A1.

Double click inside the Header. Update the title to match. Update the instructions.
Click inside the second column for the first problem.
Click Insert and go to the Drawing option. Select From Drive.

Google Drive filters for all Google Drawings. Use the search box to search for the rectangle shape. Select the rectangle drawing and click the Select button.

Select the option to insert the Drawing unlinked.

The shape fills the available space between the column borders.

Define the problem in the main space to the right of the shape. Use the cells below the main space to mark the location for student answers.

Line segments are identified with a bar or Overline above the letters. Let’s update the instructions to include the Overline.
Erase the letters AB.

Click Insert and select Equation.

Type a backslash followed by the word overline and add a space. Type the letters AB. Like this, \overline and add a space. The word overline disappears so we can type the letters.

The letters AB have the overline in place to represent a line segment. Repeat the process with the other line segment.

Repeat the process to add more problems.

Solving ten area and perimeter problems might seem easy. I like to use an exercise like this to review other concepts. The measurements are given in different units of measure like inches, feet, or yards. The values include whole numbers, fractions, and decimals. I like to include ratios and percentages whenever possible. Look at the sample for an example.
Teacher master
This is the student version for the assignment. We need a version for ourselves. This version contains the answer key. We need to make a copy of this document. Go to the menu and click File. Select the option to make a copy.

Erase Copy of from the name. Add Teacher Answer Key to the end. Select the assignment folder for the document. It’s a good idea to keep them both in the same folder.

Go through each problem and provide the answers. Set them apart with different font colors.

Multiple Choice with Google Docs
Matching assignments are useful as a formative or summative assessment. They assess student knowledge with support from possible answer choices. I use them when assessing basic concepts. They are particularly useful when assessing vocabulary and reading skills.

Introduction
Matching assignments are useful as a formative or summative assessment. They assess student knowledge with support from possible answer choices. I use them when assessing basic concepts. They are particularly useful when assessing vocabulary and reading skills.
In this lesson, you will learn to create a multiple choice quiz in Google Docs. We will use a table to organize the questions and choices.
I prefer to use Google Sheets to format the table. Sheets has a set of tools that makes this easier. Using Google Sheets to format the table frees me up to create the content without worrying about the formatting process.
Use the links below to access the resources in this lesson.
Get a copy of the final product: https://bit.ly/3hn9mmz
Get a preview of the final product: https://bit.ly/3f4BUiC
Copy of the working Document: https://bit.ly/2zvpPE8
Unicode bubble text: https://yaytext.com/bubble-text/
Preparation
We need to set up a few things. Create a new Google Document. Set the margins all the way around to a half-inch. Add another tab to your browser. Create a new Google Sheet.
I like letter choice options for students. They type the letter into a blank space next to the question or sentence. I like letters that are enclosed in a circle. They look more like the letters in a typical multiple-choice test.
Google doesn’t have a font for these letters, but there is a way to create them with the help of a web site. The link is in the introduction. You don’t have to go back to the introduction. Here is the link for you.
https://yaytext.com/bubble-text/
This website generates a letter inside a circle. Go to the web site and type the letter A in the input box. The letter font is generated in several styles. We are using the first style.

Click the copy button.

We are going to create several questions. Returning to this site for each letter gets tedious. I like to work as efficiently as possible. To this end, I use an automation option available in Google Docs.
Return to the Google Doc tab. Click Tools and select Preferences.

Click the substitutions section.

Click inside the first field on the right. Paste the character. This character replaces another character or characters we type.

Click in the field on the left. Type an open parenthesis followed by the letter a. Leave the substitute preferences open and return to the website tab.

Replace the letter A with B. Copy the character. Return to the Google Doc.

Paste the character into the box on the right. Type (b into the substitute field. Repeat this process for the letters c, d, and e. Add more letters if you need them.

I chose the open parenthesis followed by the letter because I am not likely to type this combination in the future. You can disable the replace option for these characters by removing the checkmark from the box.
These character substitutions are part of the global Google Docs preferences. They are available for all new and past documents.

Questions and choices
During the creation of each question, we are going to include special characters. These special characters will help format the table later. The character allows us to separate the text into table columns. We can use any character. I like to use a character that is not likely to appear in my question or answer choice.
I like to use the Pipe | character. It is rarely used so I like to use it for special applications. The Pipe character is on the key with the backslash (\) character. The pipe character also resembles columns.
The first question begins with a number followed by three Pipe characters. This represents three columns. The number is part of the first column. The question is part of the fourth column.

Press the Return key and begin providing the answer choices. The answer choices begin with three Pipe characters. Type a space followed by the substitution character for the letter A. An open parenthesis followed by a lower case A. Press the spacebar once after the letter to trigger the substitution.

Type the first answer choice. Press the spacebar. Type the Pipe character. Type the substitution characters for B.

Repeat the process for the remaining answer choices.

Press the Return key twice before beginning the next question. The sentence in the next example includes a period after the number. I did this for those that want to include a dot after the number. It does not affect the formatting.

In question three I added space after the number and before the question. This makes the document easier to read. Repeat the process for all the questions in the assessment.

Substitution tip
Sometimes I forget to type the Pipe character before the letter of the second choice. I updated the substation preference to include the pipe character when I use the letter b, c, and d. It saves me a step.

There is one more trick. Use one substitution for all the answer choices. I created a substitution with open parenthesis followed by the letter abcd. Make sure to include a space between each letter. Click once after each letter and type the answer choice.

Can you come up with other shortcut options?
Table conversion
Select all the questions and choices. Copy them.

Go to the tab with the Google Sheet. Paste the contents into the first cell.
The pasting process selects the rows with content. Make sure it remains selected.

Click Data and select Split text to columns.

We are prompted to select a separator. The separator is our Pipe character. Click the separator selector.

Our Pipe character is not one of the separator options. Select the custom option.

Type the Pipe character into the custom field. Sheets immediately recognizes the character and splits the text into columns.

Each question is split across several columns. We need to merge the columns for each question into one. Select all the columns that are part of the longest question. The longest question in my example is question 6. It extends to column H.

Click the Merge button.

Select the next question and click the merge button. Repeat the process for all the questions.

Select all the columns and rows with questions and answer choices. Click Edit and select copy.

Switch over to the Google document tab. Select everything and delete it. Press the Return key two or three times. Paste the Google Sheets content. You are prompted for a paste option. Select the option to paste unlinked.

The table needs some formatting.

Click Edit and choose Select All.

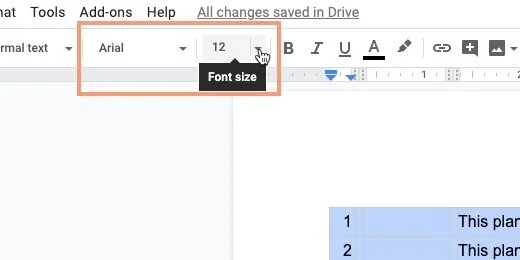
Select a font for the questions and answers. I like to use Nunito font. I also like Comfortaa font. They are easy to read. Select the 12 point font size. Click the Left Align button. Click once on the document to deselect everything.

Click and drag the right number column border inward. Move it close to the numbers but don’t crowd them.

Drag the answer space border to the right. Leave enough space for students to type the letter answer.

Drag the question border toward the left. This is the spacer. I use it to increase the space between the answer and the question.
Drag the first answer choice border to the left. Make sure there is room for the longest answer.

Select the row with the first answer choices.

Right-click in the row. Choose Distribute columns.

Right-click somewhere on the table. Choose Table properties.

Choose black for the border color. Set the border size to zero points.

Make sure the cell vertical alignment selection is Bottom. Click the OK button.

It’s starting to look like a multiple choice quiz.

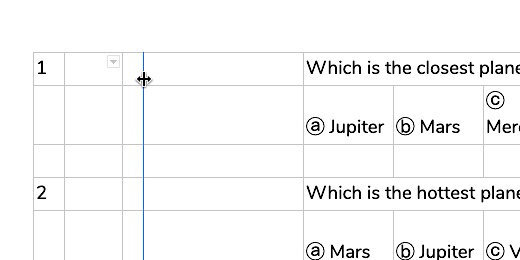
Click between the number 1 and the question. A border selector displays to the right of the cursor. Click the selector.

Choose the bottom border option.

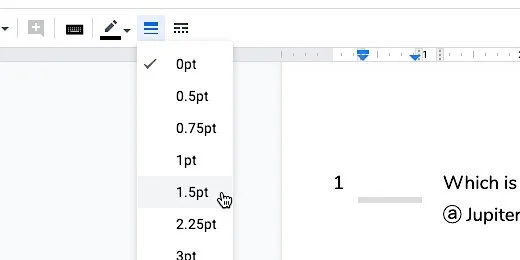
Click the border thickness selector. Choose 1.5 points.
Repeat the process for the rest of the questions.
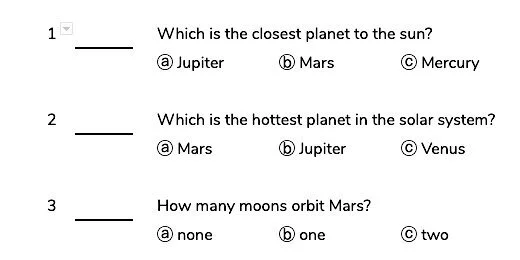
Add a title to the document and make it look nice.

This is your master document. Make a copy for students.

Update the name for the student copy.

Return to the original document. Update the name to identify it as your master document.

Set Master Version
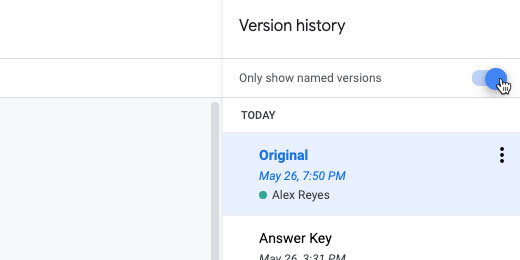
Use this document with students in the class. Use it to review the answers. Set this document as your Master and your Answer key. Click File and go to the Version history option. Select Name current version. Type Original and click Save.

Answer key
Enter the correct answer for each question. Change the answer color to red.

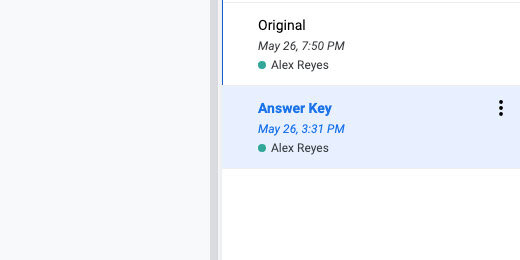
Name this version of the document Answer Key.

Selecting a version
Click File and go down to version history. Select see version history.

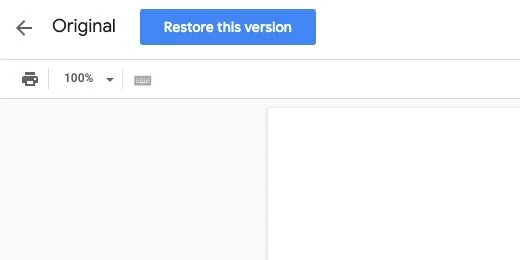
Click the option to show only Named versions. Select the Original version.

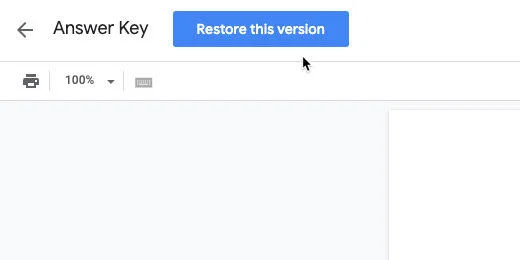
Click the Restore this version button.

Repeat this process and choose the Answer Key version to see the answer key.
Word Search puzzles with Google Docs
Students love word search puzzles. I like them because they are a fun way to reinforce vocabulary skills. I used them for spelling, sentence completion, and definitions. I thought it would be great to demonstrate how to create some crossword puzzles using Google Sheets and Google Docs. The lesson includes a copy of the completed product. Once you create a couple you will find they aren’t that hard to create.

Introduction
Word searches are fun puzzle activities. They are also a good way to reinforce word recognition. I use word searches with students to help them with spelling and word definitions. They get a fun activity and an assignment.
There aren’t many tools for creating word searches on the Internet. The few tools that exist focus on creating printable word searches. They don’t lend themselves very well to online actives in the digital age.
For this lesson, you need to create a blank Google Document. You also need a blank Google Sheet. The Sheet is used to gather the vocabulary. It is also used to format the word search puzzle. The puzzle is copied to the Google Document for final preparation and distribution.
Use the links below to get a copy or see a preview of the final product.
Get a copy: https://bit.ly/37lAFZS
Get a preview: https://bit.ly/2MPzgBf
I am including a copy of the Google Sheet with the vocabulary used in this exercise. The link is available below.
Preparing the words
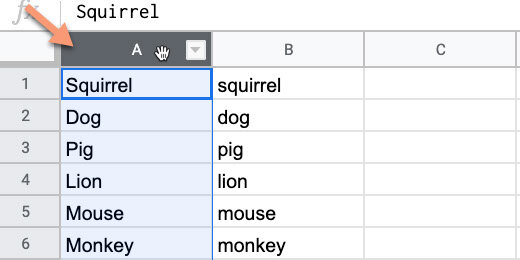
The Google Sheet has a list of vocabulary words. This word search reviews mammals covered in the lesson. In the sheet, I have the same list repeated three times. One column has the names with the first letter capitalized. The second has the letter in all upper case. The last has them all in lower case.
You can format the word search using all uppercase or all lowercase letters. The choice is yours. I want to show you how to format the words without having to retype them.
Google Sheets has plenty of useful formatting tools. I begin with Sheets when I have to deal with complex products.
Lowercase
Each word begins with a capital letter in the first column. I want all the letters to be lowercase.

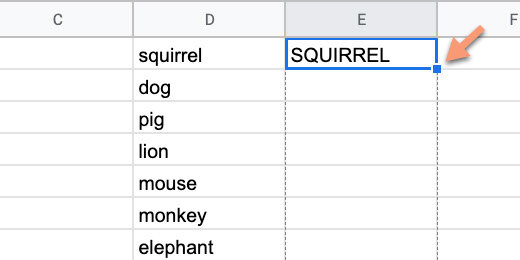
Click on cell B2 and type =LOWER(A1). Press the Return key to apply the formula. This converts all the letters in the word to lower case.
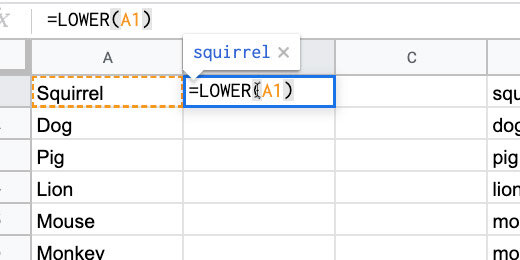
Select cell B1 again. Click the blue square in the lower right corner and drag it down.

This copies the formula down the column. Stop when you reach the end of the word list.

All the letters in each word are now lowercase.

The next column has words that are all lowercase.
Click in cell E1 and type =UPPER(D1). Press the Return key.

Return to cell E1. Click the blue square and drag it down the column.
The letters in each word are transformed to uppercase.

Converting letters to upper or lower case it not all we can do. There is a function for converting the first letter in each word to upper case. It also changes the letters after the first to lowercase.
Click in cell H1 and type =PROPER(G1). Copy the function down the column.

Selecting a word list option
We have three options for the word search lettering. We only need one. The other options need to be removed. I am using the uppercase option.
This is how to remove the unwanted word list. Click on the column header with the word list to be removed.
Click Edit and select Delete column. The column you are deleting is identified by the column letter.

The column that used the formula to convert the letters is filled with error messages. Click the column header and delete the column.

Keep deleting columns with the word lists you don’t want to use. Your list needs to be in the first or second column. You cannot have any content to the right of the column with your words.

Segment the letters
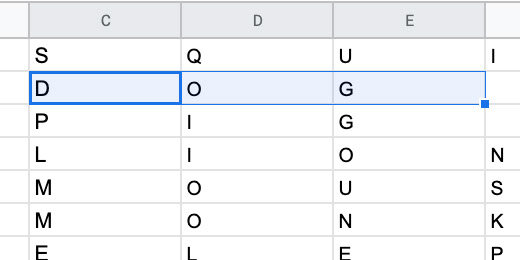
The letters for each word need to be in separate cells. Again, we are using Google Sheets to help with this process. Sheets has a split function. We are using this function in combination with Regular Expressions. Regular expressions are a type of code used to manipulate text. It is used very often by programmers.
Click in the cell to the right of the first word. Type or paste the formula below. Replace the B1 with A1 if your words are in column A.
=SPLIT(REGEXREPLACE("" & B1,"(\w)", "$1,"), ",")

The regular expression finds each letter in the word. It adds a comma after each letter. The Split formula uses the comma to split each letter and place it on a different column.

Click back on cell C1. Use the blue square to copy the formula down the column.

Organize the letters
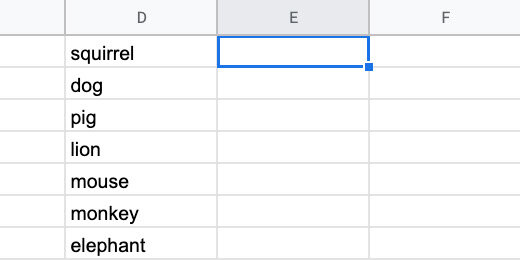
We need to organize the letters across the column for use in the puzzle. Select the first row of letters. Those are the letters for SQUIRREL.

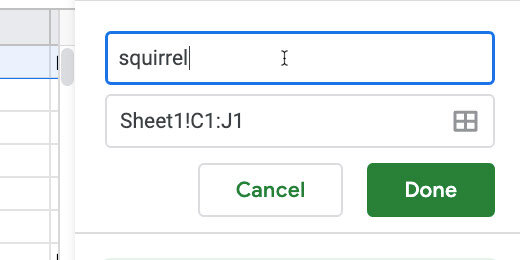
Click Data and select Named ranges.

A panel opens on the right side.

Change the name of the range to squirrel. Click the Done button.
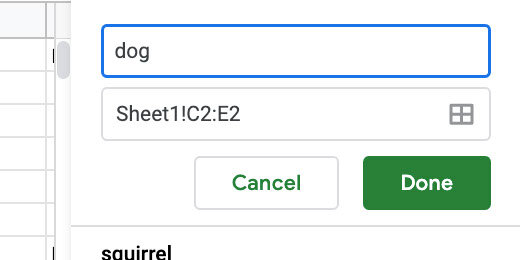
Highlight the letters for DOG in the next row.
The Range panel is still visible. Click Add a range.

Name the range dog and click the Done button. Repeat this process with all the words.
The list of named ranges is organized alphabetically.

Close the Named ranges panel.

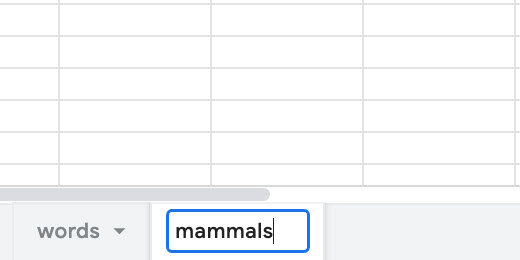
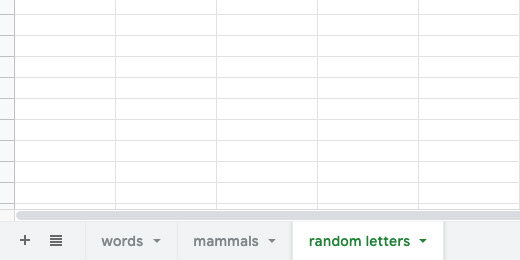
Create a new sheet
Find the Plus button at the bottom of the spreadsheet. It is next to the first sheet name.

The sheet is added to the right of the first. Double click the sheet name.

Replace the name with mammals.
Click the square above the number 1 and to the left of the letter A. This selects all the columns and rows.

Click Format and go down to the Align option. Select Center align.
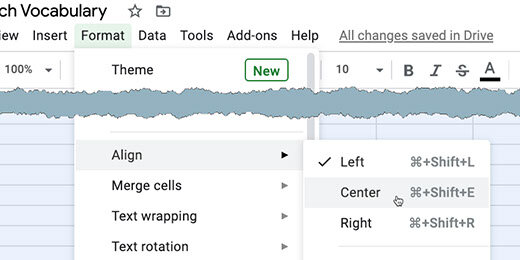
Click Format again. Go to the Align option and select Middle.

Column Size
Click on column A header. We need to select all the columns. Here is a shortcut key combination to help. Chromebook and Windows use the keyboard combination Shift+Alt+Right Arrow. Mac uses the keyboard combination Shift+Command+Right Arrow.

Right-click on one of the column headers. Select the Resize columns option.

Change the column size from 100 to 35. Click the OK button.

Click the row 1 header. Select all the rows. Here is a shortcut keyboard combination to help. Chromebook and Windows press the Shift+Alt+Down-Arrow. Mac users press Shift+Command+Down-Arrow.

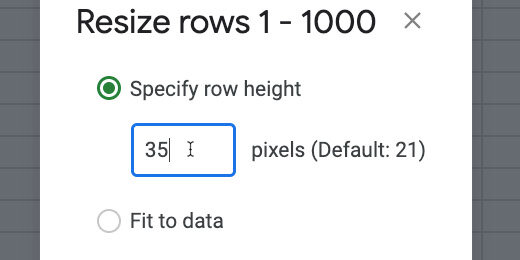
Right-click one of the row headers. Select Resize rows.
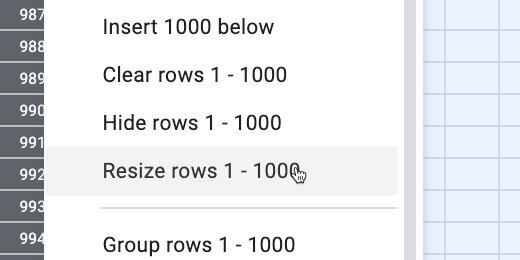
Set the row height to 35 pixels. Click the OK button.
Scroll back to the top of the sheet. Skip one or two columns and rows from the edge of the sheet. This is where we will place our first word.

Words across
The first word will go across the page. Think of one of the words you would like to use.
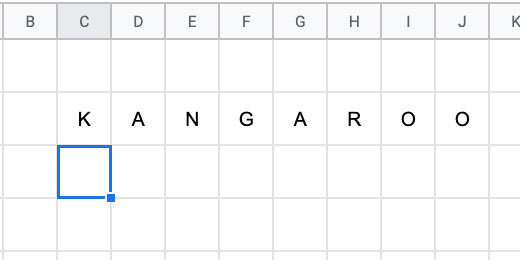
Sheets has a function to bring in an array of information from cells. The function is called ARRAYFORMULA. Type =ARRAYFORMULA followed by an open parenthesis. Type the first two letters of the word you want to use. My word is kangaroo.
The function provides help by guessing what we want. The function found our list of named ranges. The green icon next to the word kangaroo indicates a named range.

Finish typing the word and type a closing parenthesis. Press the Return key.

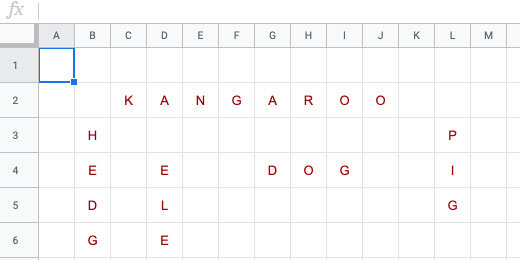
The word kangaroo appears across the row.
Words down
To place words going down the column we use a different function. Click on one of the cells below the word kangaroo. Type =TRANSPOSE(elephant) and press the Return key. Choose any word you prefer.

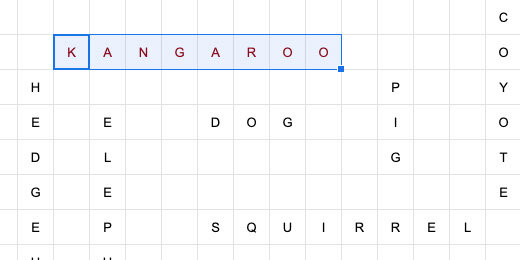
Here are the first two words. Repeat the process to place words across or down. Try to keep your words within a frame. The frame I use is usually 15 columns by 15 rows.

I provided 27 words but we don’t have to use them all. This is just the first part of an exercise. This word search includes 10 random words I chose.

The next step involves adding lots of letters in the empty squares. To keep things easy, I like to color the words. Highlight the cells of each word. Change the font color. I like to use red.
Random letter array
We need to create a random letter array. Create a new sheet. Change the sheet name to random letters.
Type each letter of the alphabet down the first column. Make sure the letter case matches the case used by the words.

Select the letters in the column. Click Data and select Named ranges.

Set the range name to alphabet.

Go back to the mammals sheet. Click on the first empty cell.
Type the function below. Copy and paste it from the text to make sure there are no mistakes.
=index(alphabet,randbetween(1,counta(alphabet)))
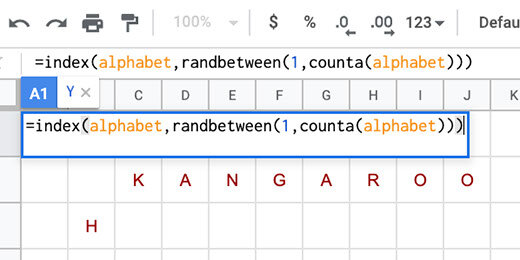
The Index function provides a number to each letter. The randbetween function selects a random letter within the selected range. The index function uses the named range to index the letters. The randbetween function uses the named range to select the random letter.
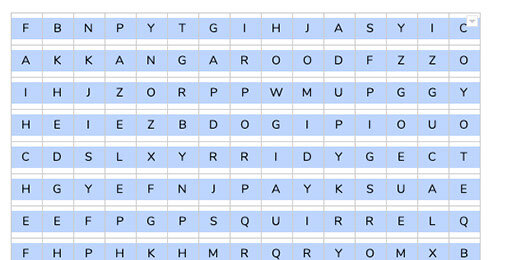
Click and drag the blue square to fill in the empty squares. I have empty squares to the right.

Stop before you reach one of the words.

Select one of the squares with a random letter. Copy the function to empty nearby cells.

Use any random letter square to fill in an empty square.

Repeat the process until you have filled in the empty cells in the grid.

Finish with Google Docs
Select all the cells in the word search. Click Edit and select copy.

Go to an open blank Google Document or create a new document. Press the Return key three times to add some space for a heading. Paste the word search.
Select paste unlinked when prompted for a paste option.

We are almost done.

Right-click anywhere on the table and select Table Properties.

Go to the table alignment option and select center. Click the OK button.

Add a title and some instructions.

This puzzle provides a list of words that are in the word search. The words are below the grid.

A list of words might be too easy. Here is another option. Provide a list of definitions.

Sentence completion is another option.

How it works
The document we created is our master. It is also the answer key. Make a copy of the document for students.

Update the name to identify is as the student copy.

Select all the cells in the student copy. Change the font color. Black is good.
Student fill-in
Students select the letters across the cells.

They use the cell background color to highlight the word.

This is what the student assignment looks like.

Master and answer key
Return to the original word search document. This is your master and your answer key. Use this document to introduce or review the assignment. You need to set restore points before using this in your classroom.
Click File and go to the Version history option. Select Name current version.

Name the version Answer key. Click the save button.

Select all the contents of the table. Change the font color to black.

Click File again. Go to version history and select Name current version. Name the version Original and click save.
The answer key
Use version history to see the answer key. Click File and go to version history. Select the option to see the version history.

The document version history is in a panel on the right. Toggle the option to show only named versions.
Click the answer key version.
Click the restore version button. Click the confirm button when it appears.
Matching and multiple choice with fill-in the blank using Google Docs
In this lesson, we create a multiple-choice assignment with google docs. This is a wonderful way to add interactivity to assignments. Create the assignment and use it as a template for future assignments. Use it for review and assessments. There are some extra tips I use with this assignment.

Multiple choice and matching assignments are a good way to review concepts. We are creating a document in Google Docs that is good for multiple choice or matching. It is also good for True/False review questions. Create a new Google Document. Type the sentences or questions. The document in this lesson is available to download if you would like to follow along. Use the link below.
Use the links belwo to get a copy or preview of the final product.
Get a copy: https://bit.ly/2BWc0zl
Get a preview: https://bit.ly/2Yqsze2
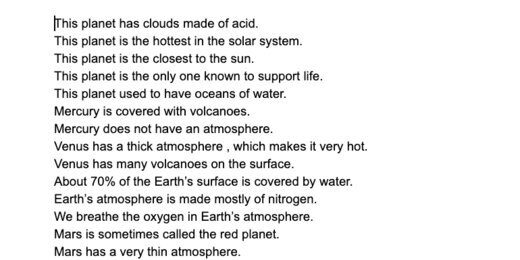
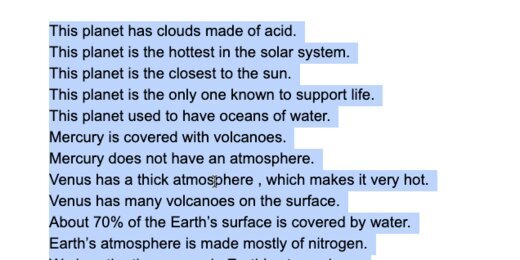
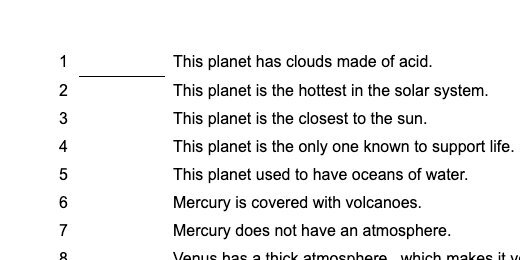
This assignment is a review of the inner planets in the solar system. Students will match the vocabulary word with the sentence.
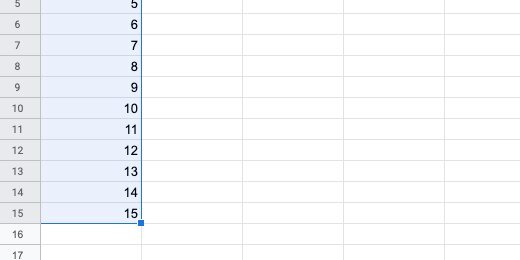
We are using a table to organize the sentences. The table provides a nice way to create underlines. Google Sheets provides a fast way to arrange the sentences into a table. Open another tab and go to the Google Sheets application. Create a blank spreadsheet. Let’s use Google Sheets to do some work for us. Type the numbers 1,2, and 3 in each cell down the first column.

Select the numbers.

I have fifteen questions in my assignment. So, I need fifteen numbers. Click and drag the little square at the bottom of the selection. Stop when the selection is at row fifteen.

This is a quick way to create a list of numbers.
Go back to the tab with the questions. Select all the questions and copy them. Return to the spreadsheet.
We need columns between the numbers and the sentences. One column is for the vocabulary space. We need a column on either side of the column to provide padding. We need three columns between the numbers and the questions or sentences. Click on cell E1 and paste.

Each sentence is placed in a separate row.

Select the cells from A1 to E15. Copy the cells. Return to the document.

Press the Return key a couple of times after the last sentence. Paste the contents of the spreadsheet.

Paste prompts for a paste option. Choose not to link the data.

We don’t need the original sentences. Select and delete them from the document.
Remove any extra lines above the table. Leave one line for the assignment information and instructions.

Drag the border on the right side of the numbers column inward.

Make sure to leave room for the numbers with double digits.

Move the next column border inward until it can't go any farther.

The next column is for the answer. Bring it inward. Leave some space for the answer. We will fine-tune this spacing later.

Move the next column inward. Move it in as far as it will go.

Move the right outside border to the right. Match the border with the page margin marker.

Select all the cells in the table.

Set the font to Ariel. Set the size to 12 points.
Click once on a cell in the table. Right-click to get the contextual menu. Select Table Properties.

Set the table border size to zero points.

Set the border color from the color picker. Choose black. Click the OK button. This color is for later.

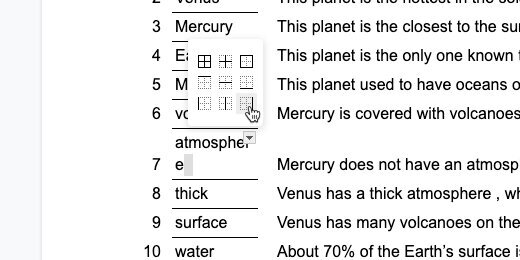
Click in the cell for the first answer space. Click somewhere in the middle. Click the border selector.

Select the bottom border option.

Go to the button bar. Select the border thickness selector. Choose one point.

This line identifies the place for students to type their answers.
Repeat the process for the remaining cells.

The spacing between the blanks and sentences is too close for me. This is how to adjust the spacing. Click once in the cell with the first sentence. Click the border selector option. The option appears on the far right. Choose the left border.

Choose a thick border option. It’s easier to select the border when it’s thick.

Nudge the border to the right.

Don't deselect the border yet. Change the border width back to zero points.

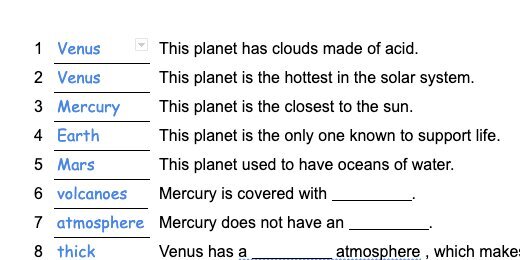
The blank spaces we created are an approximation. Fill out the spaces with the answers. One of the answers doesn’t fit in the space.

Widen the answer space. Choose the right border option.
Adjust the spacing.

This document is our answer key. Don’t erase the answers yet. Some answers are included in the sentences. We are replacing them with underlines. Go to the 6th line. Erase volcanoes.

Click the text underscore button.

Press the space bar a few tiles to create the underline.

Repeat the process with the remaining sentences.

We are almost done. I would like to cover one more option. We usually need to provide the same document to students with special needs. This requires differentiation or modifications. I include a list of the terms for these students. Click once in the space below the table. Press the Return key three times.

Click Insert and go to the table option. Create a table with four columns and four rows.

Enter each of the terms into a separate cell.

I like taking one more step. Highlight the column with the answers.

Change the font to Comic Sans. Change the color to anything you like.
Click once above the table. Press the Return key twice. Provide a title for the assignment. Make it look nice.

Make a copy of the assignment.

Update the name for the copy. This is the one going to students.

Highlight the answer column on the student copy. Press the Delete key to erase the contents.

Distribute this document using Google Classroom.
Teacher Master Document
You are eventually going to use this document with students. Use the document for a whole group activity. Use it to check the assignment answers with the class. Use it for teaching and review. Return to the tab with the original version. This is what I do with my documents when using them with students. I use Google’s Version history. Make sure none of the answers are on the document. Click File and go down to version history. Select the option to name the current version.

Name the version Original and click Save.

Fill in some of the answers.

Click File and go to version history. Select see Version history.

Click the Original history marker.

Click Restore this version. The blanks are empty again.

Answer key version
It’s nice to have a version for the answer key. Fill in the blanks with the answers. Create a version and name it Answer Key. Go back to version history and retrieve the original version. Retrieve the answer key by selecting it from version history.
Bonus
Enable the option to show only named versions.

Fill in the blank document with Google Docs No table required
This lesson creates a fill in the blank exercise without using tables. We use the equation editor to make the process easier. Create the assignment and distribute it to students using Google Classroom. Use the same document for review and assessment.

Fill in the blank – no tables required
I a previous lesson I showed how to create a fill in the blank sentences document. I used a table to format the paragraph. This is a great method, but it does take time to create. I have a faster method for you. The first step is to create sentences or paragraphs. Use the link below to get a copy if you want to follow along.
Use the links belwo to get a copy or preview of the final product.
Get a copy: https://bit.ly/2MJUalj
Get a preview: https://bit.ly/3dSAQhE

sample paragraph
Highlight the words you want to assess. Select a word and use the background color selector. Choose a light color so the text is still easy to read.

choose a light color to highlight words
The paragraph looks something like the image below.
highlight words to be assessed
Highlight the paragraph and make a copy.

select the paragraph and make a copy
Insert a few carriage returns between the paragraphs. Paste the copy below.

paste below the previous paragraph
Erase the first word.

erase one of the words
Click Insert and select Equation.

insert an equation
Type a backslash followed by the word underline.
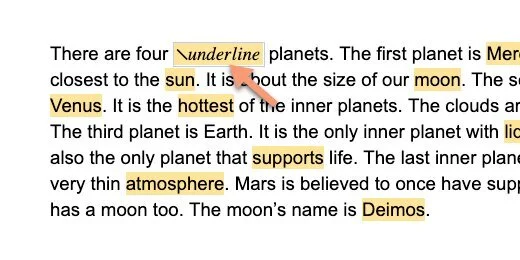
backslash and underline
Press the spacebar five times. This creates the underline. The underline doesn't have to be very wide. The underline command does not show as part of the paragraph.

fillable space created
Repeat the process with the next word. The missing words in my example are highlighted. I like this option. It helps students identify where words need to be inserted.
To keep the highlight, follow this step. Highlight the word and don't erase it. Insert the equation command while the word is selected.

spaces with and without highlighting
Students type the words on the underline. The space increases to accommodate the word.

words placed in the paragraph
Make a copy of the document.
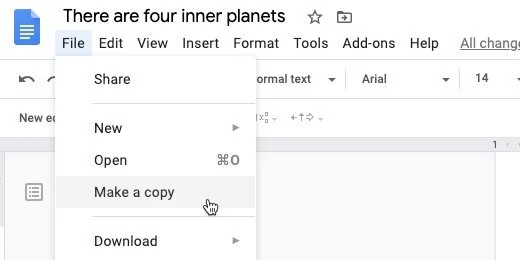
make a copy
Make sure to update the name.

rename the copy
Add a heading and make it look nice. Distribute to students using Google Classroom.

format the student copy
Teacher Master Document
You are eventually going to use this document with students. Use the document for a whole group activity. Use it to check the assignment answers with the class. Use it for teaching and review. Erasing the answers is easy but tedious. This is what I do with my documents when using them with students. Return to the tab with the original version. Click File and go to version history. Select the option to name the current version.

name a version for the master
Name the version Original and click Save.

name the master original
Go ahead and fill out part of the document.

fill in some of the words
Click File and go to version history. Select See version history.

see version history
Selection the Version marked as Original.

select the original version
Click Restore this version. The document with the empty blanks is restored.
restore the original version
Answer key version
It’s nice to have a version for the answer key. Fill in the blanks with the answers. Create a version and name it Answer Key. Go back to version history and retrieve the original version. Retrieve the answer key by selecting it from version history.
Bonus
Enable the option to show only named versions.

show only named versions
Fill in the blank with Google Docs
Fill in the blank exercises are useful for younger students. They are helpful when learning new vocabulary. I like using fill in the blank, or Cloze sentences with students. In this lesson, we are using Google Docs and Google Sheets. Google Sheets is useful when creating the table to separate the vocabulary.

Use tables to format the sentences
Fill in the blank exercises are useful for younger students. They are helpful when learning new vocabulary. I like using fill in the blank, or Cloze sentences with students. They reinforce vocabulary skills using context. Students use the surrounding words to infer which word needs to be in the sentence. They apply vocabulary in context. It provides a valid assessment of their comprehension.
Use the links below to get a copy or preview the final product.
Get a copy: https://bit.ly/2zpLai8
See a preview: https://bit.ly/2zmzSv3
In this lesson, we are using Google Docs and Google Sheets. Google Sheets is useful when creating the table to separate the vocabulary. I use the sheet as a tool during the creation process. I keep one around like scratch paper.
Create a Google document for the paragraph. Create a blank spreadsheet to format the table. Have both tabs open in your Chrome browser.
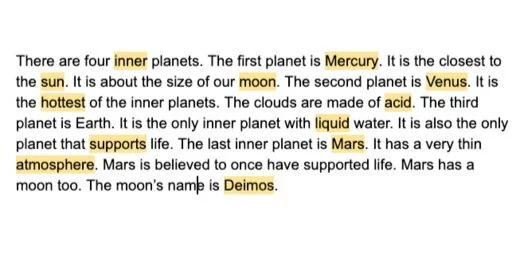
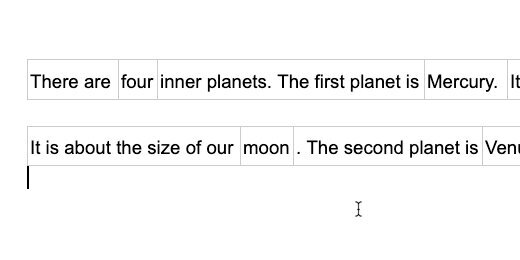
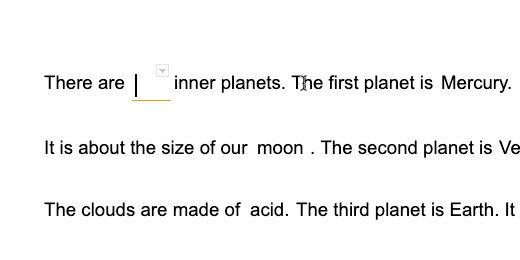
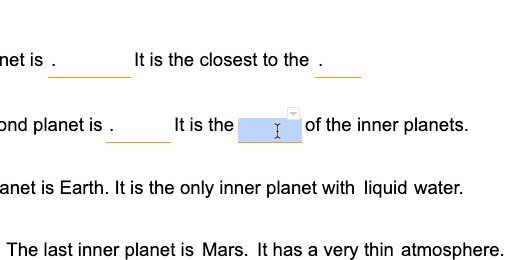
Begin with the paragraph. This is the template and answer key. This paragraph reviews concepts and vocabulary for a lesson on the inner planets. Use the link below to get a copy and follow along.
Get the example paragraph copy
This works better when the document is in landscape orientation. Click File and select Page Setup.
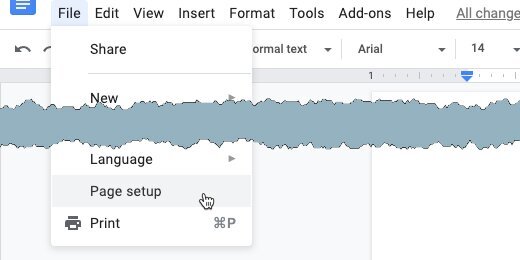
page setup
Select Landscape and the OK button.

set page to landscape mode
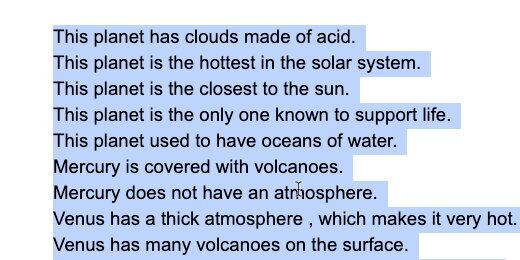
The paragraph has several terms related to the inner planets. I Select and highlight each word to be assessed.

sample paragraph
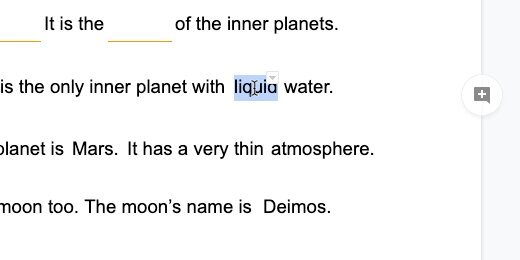
Double-click on a word. Use the background color picker. Use a light yellow color.

highlight color
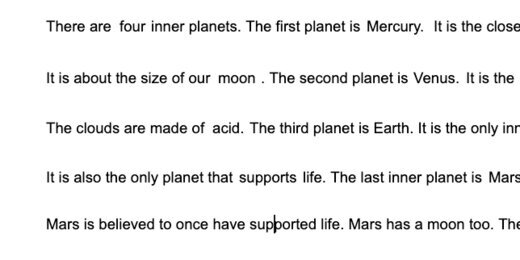
This what my paragraph looks like. Highlight the words in my image.

select words highlighted
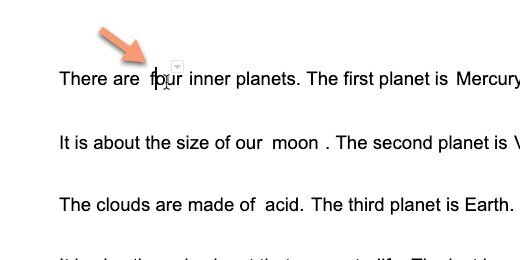
Insert a hard return before the next sentence that wraps around. Make sure each line ends in a complete sentence. This makes things easier.

end lines with hard returns
To separate the vocabulary in Sheets, we need markers to identify the separations. The marker can be any symbol. It can’t be a letter. I like to use the asterisk. Place an asterisk before and after each highlighted word. Place the asterisk after a period if the word comes before a period.
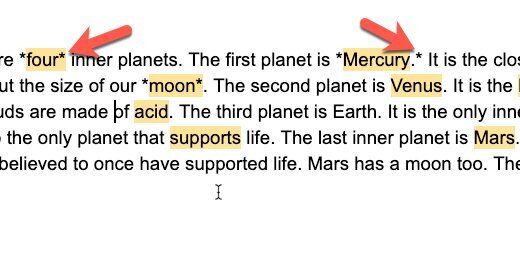
asterisks to separate words
Select the first line of sentences and copy them.

copy the first line
Go to the blank spreadsheet. Paste the sentences into the first cell.
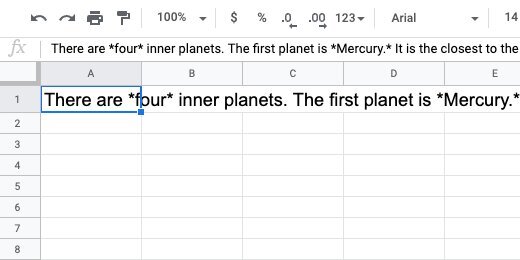
paste the line into the first cell
Go back to the document and copy the next line of sentences. Paste it into the next row in the Sheet. Copy each sentence and paste it into a separate row.

paste each line into a separate row
Select all the rows in the first column that have sentences.

select rows with sentences
Click Data and select Split text to columns.

select split text to columns
Sheets uses a separator to identify where to split the text. This is the asterisk we used.

select separator
Click the separator selector. The asterisk is not part of the standard separators. Select the Custom option.

choose custom seperator
Type the asterisk into the custom field. The words are instantly separated.
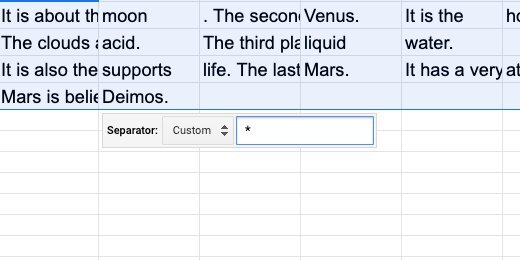
set the separator to the asterisk
Find the last column with sentence information. Select everything in the first row up to that column. Copy the contents.

select the first row with content
Return to the document. Press the Return key after the paragraph a few times. Paste the sentences. Google wants to know if it should keep the link with the spreadsheet. Select the option to paste unlinked. Click the Paste button.
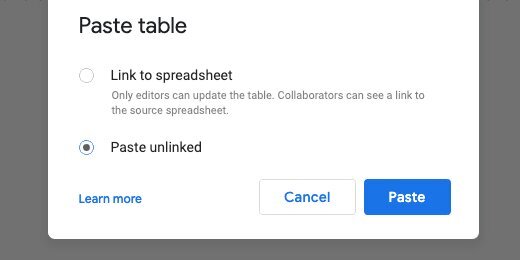
paste the row into the document and unlink from the sheet
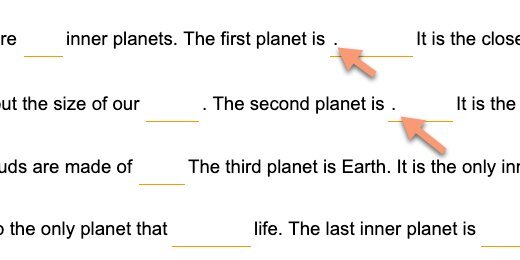
We need to resize the columns.

the sentence separated into separate columns
Click and drag each column separator so the sentence looks uniform.

adjust the column width and height
Copy the next sentence from the sheet. Paste it below the first sentence table. Each line of the sentence is pasted into a separate table with one row.

cursor below table
It’s easier to use separate tables.
paste next sentence
Repeat the process with the remaining sentences.

paste all sentences and adjust
We need to remove the table borders. Click inside on one of the cells in the first table. Go to Format in the menu. Move down to the table option. Select Table properties.

table properties
Click the table border size. Choose zero points. Click the OK button.

set border to 0pt
Repeat the process for the other tables.
all tables with no border
Click on the first word to be filled in.
select word to erase
The border selector appears above the word. Click the selector. Choose the bottom border.

select bottom border option
Click the border color selector. Choose a color. I like the orange color.

select border color
Click the line size selector. Choose 1 point.
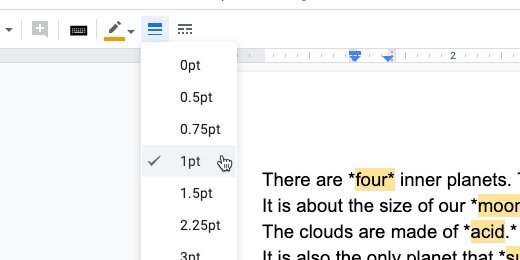
set border to 1pt
Erase the word. Repeat the process with the other words.
erase word
It gets tedious selecting the border color and width. Here is a timesaver. Copy the contents of a formatted cell. Make sure it doesn't have a period.
repeat with other words
Highlight the next word and paste. This erases the word and formats the cell.
paste format to save time
Everything is looking nice. I have some periods in odd places.
dealing with periods
Click in the cell with the period that is in an odd place. Click the Right align button.

align text to the right
All is right with the world.

repeat with all sentences that need it
Keep this document as your answer key. Make a copy.

make a copy of the document
Update the name for the copy.

rename the copy
Remove the original paragraph. Add a heading and make it look nice. Distribute to students with Google Classroom.

format the student copy
Teacher Master Document
You are eventually going to use this document with students. Use the document for a whole group activity. Use it to check the assignment answers with the class. Use it for teaching and review. Return to the tab with the original version. This is what I do with my documents when using them with students. I use Google’s Version history. Make sure none of the answers are filled in. Click File and go down to version history. Select the option to name the current version.

set a restore point for the master
Name the version Original and click Save.

set restore point name
Go ahead and fill out part of the document.

fill in the document
Click File and go to version history. Select see Version history.

see version history
Selection the version marked as Original.

select the original version
Click Restore this version. The document with the empty blanks is restored.

restore to the original
Answer key version
It’s nice to have a version for the answer key. Fill in the blanks with the answers. Create a version and name it Answer Key. Go back to version history and retrieve the original version. Retrieve the answer key by selecting it from version history.
Bonus
Turn on the option to show only named versions.

show only named versions
Auto Export Google Docs to Microsoft Word
Google provides an easy way to download a copy of a document for Microsoft Word. The same is true for Sheets and Slides. Those that are new to Google aren't familiar with the process. This process does not require them to export their document. Google Drive will do all the work for them and you.

Introduction
In this lesson, we will provide options in Google docs for those that prefer to get a document for use with Microsoft Word.
I often encounter educators that would rather use Microsoft. To that end, they prefer to receive Microsoft Word documents. They are not familiar with Google Drive and struggle to export a copy of a document. I use this method when providing documentation and resources to a mixed group of users.
Google provides an easy way to download a copy of a document for Microsoft Word. The same is true for Sheets and Slides. Those that are new to Google aren't familiar with the process. This process does not require them to export their document. Google Drive will do all the work for them and you.
Exporting to Microsoft Word
Open Google Drive and open a Doc you would like to share. Click the share button.
Google Docs share button
Click the advanced link.

Share Advanced option
We are going to set the permissions for the document. This is a permission to allow anyone to download a copy. Click Change.

Change share option
Select the option so that anyone with the link can access the document. The permission is automatically set to view only. Click the Save button and then click the Done button.

Share with anyone with the link
Every document, spreadsheet, and slide in Google Drive is given a unique identifier. This identifier is seen in the Address Bar. At the end of the Identifier is a forward slash followed by the word edit. Click once inside the Address bar. Click once again after the word edit.

Google Document Identifier in address bar
Erase the word edit. Replace the word with export?format=docx. This modified link is what we share with those that need a version in Microsoft Word. We are instructing Google Docs to export this document in the Microsoft Word format. The Microsoft Word format has the extension docx.
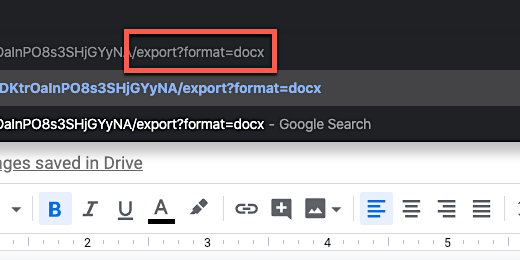
Modified link to export the document
Highlight the complete link. Copy the link by right-clicking and selecting Copy. Paste this link anywhere to share the document.
I share documents and content on a Google Site for my audience. This particular document is part of a summer program. In Google Sites, I highlight the text and click the link button.

Link text in Google Sites
Paste the link when the configuration box opens.

Link in configuration box
I provide other options too. I have an option to share the link as a PDF. This is useful if I don’t want them to edit the document and distribute it with their edits.
I use the same link to provide a PDF version. All I need to do is paste the link and change the docx extension to pdf.

Link with option to export PDF version
A file in the converted format is downloaded and saved to their computer or device.
Google Docs Templates
Document templates are useful. They minimize the amount of work we need to do on a document. They have elements in place. These elements include page size, headers, footers, and page numbers. Templates in a work environment are essential. These templates usually come in the form of letterheads or reports. The method I'll describe here is easy to make and access. I hope you find it useful.

Introduction
Document templates are useful. They minimize the amount of work we need to do on a document. They have elements in place. These elements include page size, headers, footers, and page numbers. Templates in a work environment are essential. These templates usually come in the form of letterheads or reports.
The Enterprise version of Google Drive permits users to create document templates. These templates can be shared with others in groups or teams. Outside of the Enterprise version, we don't have this option. This doesn’t mean we have to go without templates.
There are several very good instructions out there that I have used. I have shown some of them to teachers. These methods require some time to create and use. We usually find it too cumbersome to follow the steps to use a template with these methods.
The method I'll describe here is easy to use and access. I hope you find it useful.
Setup a template
Go to Google Drive and create a new Google Doc. Here is a quick way to do it. Type https://docs.google.com/create.
Give the template a useful name. The name needs to identify the purpose of the template. This template is for a letterhead.
The name for this template is Letterhead A4.

Click File and go to the bottom of the menu. Select page setup. Select the A4 paper size. Change the margins. Set the bottom and side margins to .5 inches. Set the top margin to .75 inches. Click the Ok button.

Click Insert on the menu. Go to the Headers & footers option. Select header.

Click inside the header and place some text for the letterhead.

Style the text for the header. In my letterhead, I changed the font size to 24 points. The font is set to Merriweather. I changed the color and center-aligned the text. Create a letterhead for your needs.

Go back to the Insert menu. Select Insert page numbers. Select an option for the placement of the page number.

The insert page options place the page number on one of the page corners. We can place the page number on the center of the page. Go to the button bar. Click the center text alignment button.

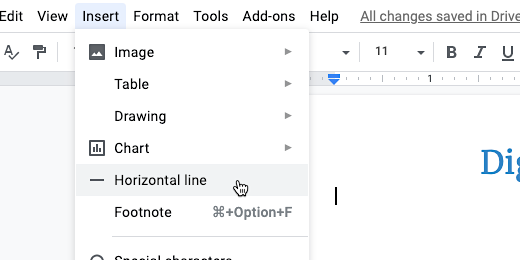
Click once on the document so the cursor is below the header. Click Insert and select the Horizontal line.
That’s good enough for now.
Creating the template
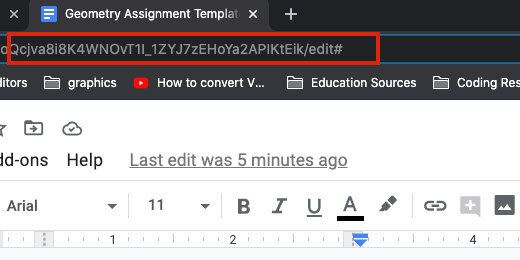
Each Google document has a unique link. This is how Google Drive stores, organizes and retrieves documents. We will use this link to make the document into a template. Every document begins with https://docs.google.com/document/.
There are a letter and a series of characters after this link information. The random letters and numbers are the file name for the document. They are unique for every document.
The link ends with a forward slash and the word edit. This identifies that the document is open and being edited.

Click once inside the address bar. Clicking inside will select the complete link. Click again to place the cursor after the word edit. Erase the word edit. Leave the forward slash.
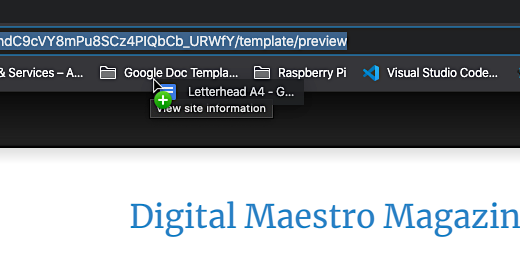
Type template/preview and press the Return key.

Google Docs creates a preview and template of the document. The preview appears on the page. A button on the top right corner reads Use Template. Don’t click this button yet.

Right-click on the bookmarks bar.

Go down the list of menu items and select Add Folder. Set the name of the folder to Google Doc Template. Make sure Bookmarks Bar is selected and click Save.

The beginning of the link shows a padlock.
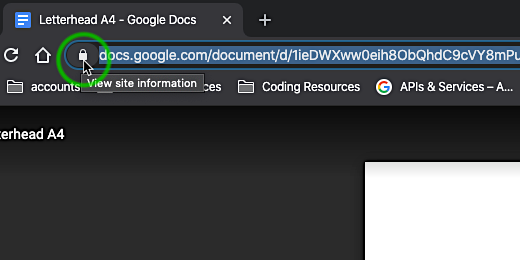
Click the padlock icon and drag it over to the folder we created. Release when the link is over the folder. The link is now bookmarked.
Let’s see how this works. Go to a website. I think digitalmaestro.org is a good place to visit.
Click the bookmark folder and select the document link.

Click the Use Template button.

Change the name of the document.

Use the same process to create any template. One of the things I like about this method is that I can change the original document. The changes are applied to the template when I use it the next time.
I recommend creating a folder on Google Drive. Title the folder templates. Place the templates in this folder. Modify the templates as needed.
Google Doc paragraph styles
Paragraph styles allow us to quickly and easily update all the text in our document. Paragraph styles are commonly used in publication software.

Formatting paragraphs
Paragraph styles allow us to quickly and easily update all the text in our document. Paragraph styles are commonly used in publication software.
Google Docs includes paragraph styles for titles, subtitles, headings, and regular paragraphs. We will focus on paragraphs styles for most of the article.
Create a new Google document. You don’t need to create any content for the document. We will be using Lorem Ipsum text. This text is used as place holder text. Place holder text is commonly used to create the layout of newspapers, magazines, and websites. It is used to determine the layout of the finished product. Written content is usually imported into a final product. The final text replaces the placeholder text.
There are places on the web that have Lorem Ipsum text available for designers. There are several Lorem Ipsum generators out there. One that I use regularly is https://loremipsum.io/. Go to this website. Click the Generate button. Generate five paragraphs of text. Click the Copy button.

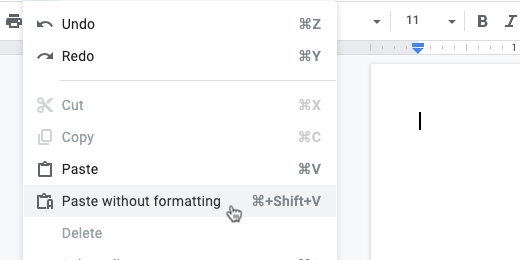
Return to the Google document. The copied text is formatted with extra code. This code has extra formatting information we don’t want. We need to strip this code away. Click edit in the menu and select Paste without formatting. Removing the formatting assures that the formatting comes from the paragraph styles in our document.
Five lengthy paragraphs are inserted. I like to break up the paragraphs. Click somewhere in the middle of each paragraph and press the return key twice.

Pressing the return key twice is one way to create new paragraphs. It is not the best way. It is formatting from the old typewriter days. We don’t do this anymore. Let’s begin with formatting the paragraphs. Select the first paragraph.
Selecting text
You probably clicked and dragged your mouse from the beginning of the first sentence to the end of the last. Here is another way to do the same thing. Click three times anywhere in the paragraph. That selects all the contents of the paragraph without the need to click and drag. This is useful when using a laptop with a trackpad that might be hard to use.

Begin by changing the font. I like to use a font with different typeface options. A font is a family of typefaces. A typeface is like thin, bold, or italic. One font family I like to use is Montserrat. It offers a variety of typefaces. I think they are easier to read on screen.

Adding fonts
You might not have any of these font families installed. So let’s go and install one or two. The fonts are not installed on your computer or device. They are associated with your Google Document. Click the font selector and choose More fonts.

There are thousands of fonts available. You could spend hours just looking through them. Feel free to do so. We are interested in installing specific ones here.

Type Montserrat in the search box. Click on the font once when it appears in the list. A check mark appears next to the name and the font family is added to our account. That was easy. Click the OK button to return to the document.

The new font is selected and applied to the paragraph.

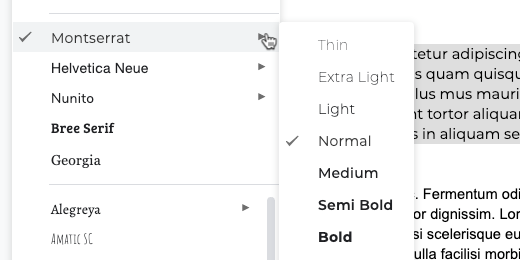
Click the font selector and hover over the triangle next to the font family name. The normal typeface is applied to the paragraph. This is exactly what we want.
Updating paragraph styles
The paragraph we selected has the typeface applied but it is not applied to the other paragraphs. Instead of selecting each paragraph and applying the font we will use the paragraph style to do the work for us. Make sure the paragraph is sill selected and click the paragraph styles selector.
Don’t click on a style because it will return the paragraph to the previous font, Ariel. If this happens go back and select the Montserrat normal typeface again.

Move your mouse over the triangle to the right of the normal text paragraph style. Select the option to update the normal text style to match our changes. The rest of the paragraphs in the document will update.

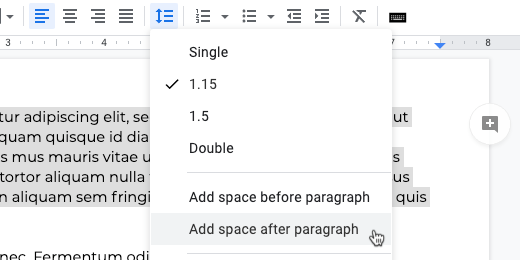
Earlier, we pressed the return key twice to create a new paragraph. It should be one Return only. Keep the paragraph selected. Click the line spacing selector. Choose Add space after paragraph.
Extra space will be added after our paragraph. This space is in addition to the space created from the extra return. Update our normal text paragraph style. Click the paragraph styles selector. Update the Normal text paragraph style.

All the paragraphs have the extra space added between the paragraphs. Click once between each paragraph and delete the extra Return.