Geometry assignment document

Introduction
In previous lessons, we learned to create a variety of geometric shapes and angles. In this lesson, we are going to bring them all together to provide assignments for students. The links to the shape and angle lessons are available below. A preview of the final product is also available.
Basic Geometric Shapes with Google Drawings
Preview and copy of the final product.
Area and perimeter
Open Google Drive and create a folder for the geometry assignments. Create a Google Document. Set the name of the document to Geometry Assignment Template. Go to the menu and click File. Select the Page Setup option.

Set the page size to Legal. Change all the margins to .5 inches. Click the Ok button. The legal size page format provides more space for the shapes. We can also use the A4 format.

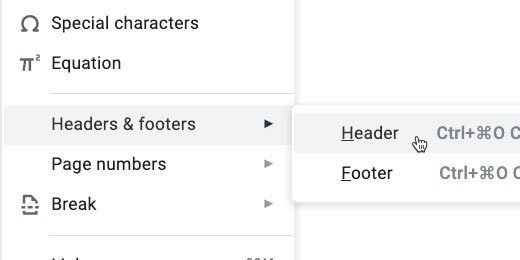
Go to the menu again and click Insert. Go to the Headers & footers option. Select Header.
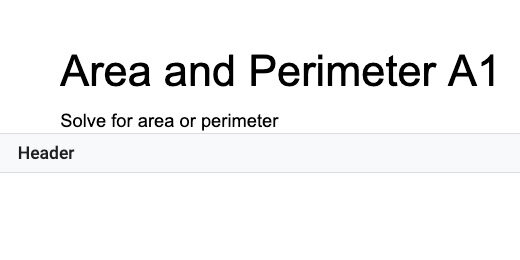
Set a title for the assignments. Provide instructions for students. I used the Title paragraph style for the assignment title. I have a coding scheme that helps me keep track of my assignments. Assignments begin with the Letter A. The letter is followed by the number of the assignment. I use Q for quizzes and T for tests. I use this information in my grade book.
This is a placeholder title. Replace it with each new assignment.
Click once in the document body. Press the Return key once. Click Insert and go to the Table option. Create a table with four columns and two rows.

The first column is used to number the problems. Type the number 1 and a closing parenthesis. Move the table column table border on the right. Move it close to the number but don't crowd it. The column needs to be wide enough to accommodate two-digit numbers.

We are going to adjust the column for the shapes. Go to the ruler. Find the column marker. It is next to the right indent marker.

Move the column marker to 2.5 inches.

Select the last two columns in the first row.

Click Format and go to the Table option. Select the option to distribute the columns.

Select the two rows in the second column.

Use Format to get to the Table option. Choose Merge cells.

Select the last two columns in the first row and merge them. This is the basic format for our geometry assignment template.

Go to the menu and click Format. Go to the table option. Select table properties.

Change the table border width to .5 points. Change the minimum row height to 2.

Click the border color selector. Select dark gray 1. Click the OK button to save the changes.

This is our basic template.

Select all the cells in the table. Click Edit and select Copy.

Click once below the table. Paste the contents.

Paste the table three more times. The fifth table is added to a second page. Keep pasting the table until there are 10. Change the numbers in each table to match the table count.

We have three pages with templates for geometry problems. The instructions from the heading are very close to the first table on each page. Double click inside the Header. Go to the end of the instructions and press the Return key once.

Using the template
The basic template is ready. I’ve shown how to do the next step in a previous lesson. The link to the lesson is available below.
Create a Template folder in the Bookmarks bar for the next step.
Go to the Chrome browser address bar.
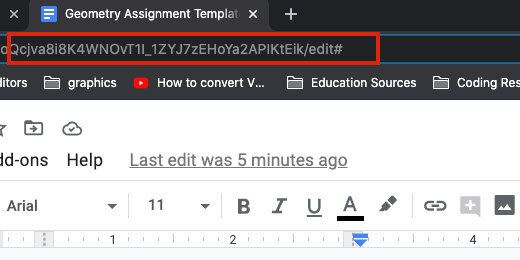
Erase Edit# and replace it with template/preview.

Go to the beginning of the document link. Click the Lock icon and drag it to the address bar.

Drop the icon over the Template folder. Make sure to wait for the folder to highlight before releasing it.

Click the folder and select the geometry assignment template.

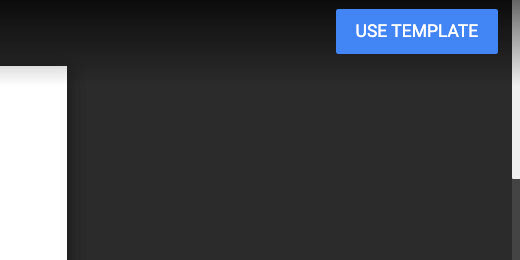
Click the Use Template button.
The assignment
Change the name of the document. This document's name is Geometry Perimeter A1.

Double click inside the Header. Update the title to match. Update the instructions.
Click inside the second column for the first problem.
Click Insert and go to the Drawing option. Select From Drive.

Google Drive filters for all Google Drawings. Use the search box to search for the rectangle shape. Select the rectangle drawing and click the Select button.

Select the option to insert the Drawing unlinked.

The shape fills the available space between the column borders.

Define the problem in the main space to the right of the shape. Use the cells below the main space to mark the location for student answers.

Line segments are identified with a bar or Overline above the letters. Let’s update the instructions to include the Overline.
Erase the letters AB.

Click Insert and select Equation.

Type a backslash followed by the word overline and add a space. Type the letters AB. Like this, \overline and add a space. The word overline disappears so we can type the letters.

The letters AB have the overline in place to represent a line segment. Repeat the process with the other line segment.

Repeat the process to add more problems.

Solving ten area and perimeter problems might seem easy. I like to use an exercise like this to review other concepts. The measurements are given in different units of measure like inches, feet, or yards. The values include whole numbers, fractions, and decimals. I like to include ratios and percentages whenever possible. Look at the sample for an example.
Teacher master
This is the student version for the assignment. We need a version for ourselves. This version contains the answer key. We need to make a copy of this document. Go to the menu and click File. Select the option to make a copy.

Erase Copy of from the name. Add Teacher Answer Key to the end. Select the assignment folder for the document. It’s a good idea to keep them both in the same folder.

Go through each problem and provide the answers. Set them apart with different font colors.
