Matching and multiple choice with fill-in the blank using Google Docs

Multiple choice and matching assignments are a good way to review concepts. We are creating a document in Google Docs that is good for multiple choice or matching. It is also good for True/False review questions. Create a new Google Document. Type the sentences or questions. The document in this lesson is available to download if you would like to follow along. Use the link below.
Use the links belwo to get a copy or preview of the final product.
Get a copy: https://bit.ly/2BWc0zl
Get a preview: https://bit.ly/2Yqsze2
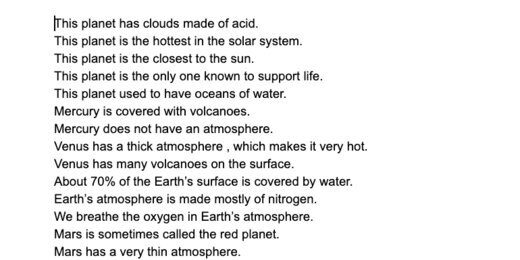
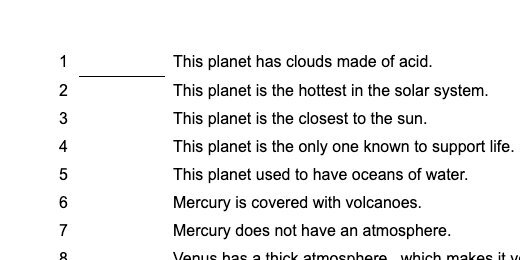
This assignment is a review of the inner planets in the solar system. Students will match the vocabulary word with the sentence.
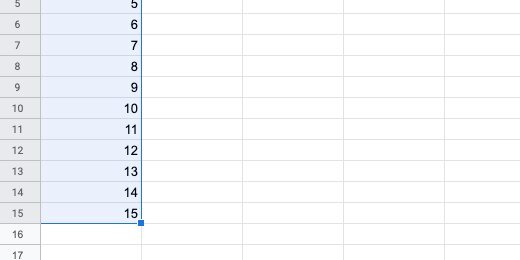
We are using a table to organize the sentences. The table provides a nice way to create underlines. Google Sheets provides a fast way to arrange the sentences into a table. Open another tab and go to the Google Sheets application. Create a blank spreadsheet. Let’s use Google Sheets to do some work for us. Type the numbers 1,2, and 3 in each cell down the first column.

Select the numbers.

I have fifteen questions in my assignment. So, I need fifteen numbers. Click and drag the little square at the bottom of the selection. Stop when the selection is at row fifteen.

This is a quick way to create a list of numbers.
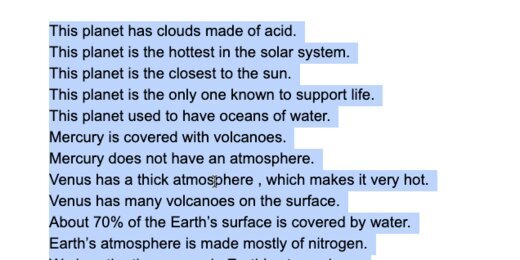
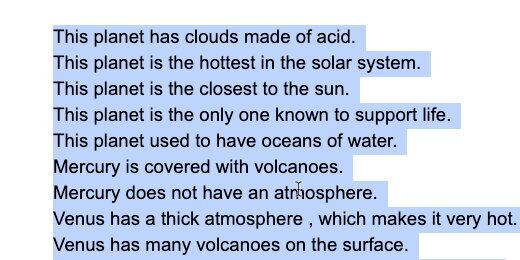
Go back to the tab with the questions. Select all the questions and copy them. Return to the spreadsheet.
We need columns between the numbers and the sentences. One column is for the vocabulary space. We need a column on either side of the column to provide padding. We need three columns between the numbers and the questions or sentences. Click on cell E1 and paste.

Each sentence is placed in a separate row.

Select the cells from A1 to E15. Copy the cells. Return to the document.

Press the Return key a couple of times after the last sentence. Paste the contents of the spreadsheet.

Paste prompts for a paste option. Choose not to link the data.

We don’t need the original sentences. Select and delete them from the document.
Remove any extra lines above the table. Leave one line for the assignment information and instructions.

Drag the border on the right side of the numbers column inward.

Make sure to leave room for the numbers with double digits.

Move the next column border inward until it can't go any farther.

The next column is for the answer. Bring it inward. Leave some space for the answer. We will fine-tune this spacing later.

Move the next column inward. Move it in as far as it will go.

Move the right outside border to the right. Match the border with the page margin marker.

Select all the cells in the table.

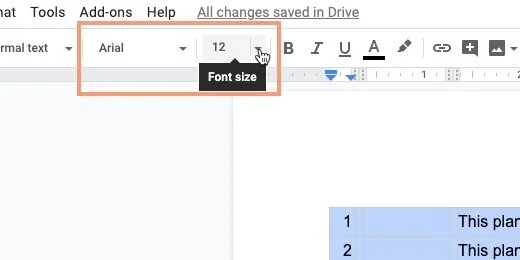
Set the font to Ariel. Set the size to 12 points.
Click once on a cell in the table. Right-click to get the contextual menu. Select Table Properties.

Set the table border size to zero points.

Set the border color from the color picker. Choose black. Click the OK button. This color is for later.

Click in the cell for the first answer space. Click somewhere in the middle. Click the border selector.

Select the bottom border option.

Go to the button bar. Select the border thickness selector. Choose one point.

This line identifies the place for students to type their answers.
Repeat the process for the remaining cells.

The spacing between the blanks and sentences is too close for me. This is how to adjust the spacing. Click once in the cell with the first sentence. Click the border selector option. The option appears on the far right. Choose the left border.

Choose a thick border option. It’s easier to select the border when it’s thick.

Nudge the border to the right.

Don't deselect the border yet. Change the border width back to zero points.

The blank spaces we created are an approximation. Fill out the spaces with the answers. One of the answers doesn’t fit in the space.

Widen the answer space. Choose the right border option.
Adjust the spacing.

This document is our answer key. Don’t erase the answers yet. Some answers are included in the sentences. We are replacing them with underlines. Go to the 6th line. Erase volcanoes.

Click the text underscore button.

Press the space bar a few tiles to create the underline.

Repeat the process with the remaining sentences.

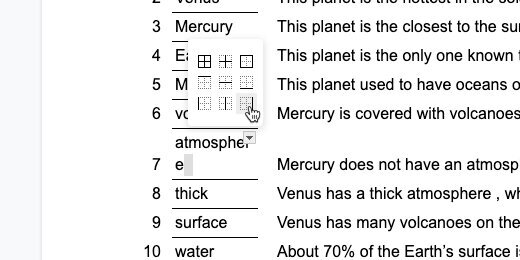
We are almost done. I would like to cover one more option. We usually need to provide the same document to students with special needs. This requires differentiation or modifications. I include a list of the terms for these students. Click once in the space below the table. Press the Return key three times.

Click Insert and go to the table option. Create a table with four columns and four rows.

Enter each of the terms into a separate cell.

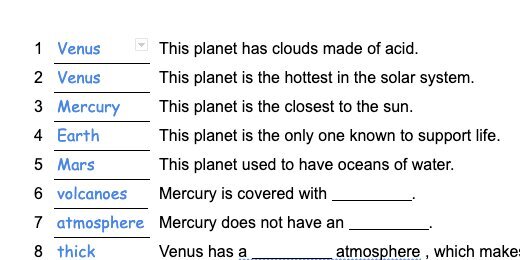
I like taking one more step. Highlight the column with the answers.

Change the font to Comic Sans. Change the color to anything you like.
Click once above the table. Press the Return key twice. Provide a title for the assignment. Make it look nice.

Make a copy of the assignment.

Update the name for the copy. This is the one going to students.

Highlight the answer column on the student copy. Press the Delete key to erase the contents.

Distribute this document using Google Classroom.
Teacher Master Document
You are eventually going to use this document with students. Use the document for a whole group activity. Use it to check the assignment answers with the class. Use it for teaching and review. Return to the tab with the original version. This is what I do with my documents when using them with students. I use Google’s Version history. Make sure none of the answers are on the document. Click File and go down to version history. Select the option to name the current version.

Name the version Original and click Save.

Fill in some of the answers.

Click File and go to version history. Select see Version history.

Click the Original history marker.

Click Restore this version. The blanks are empty again.

Answer key version
It’s nice to have a version for the answer key. Fill in the blanks with the answers. Create a version and name it Answer Key. Go back to version history and retrieve the original version. Retrieve the answer key by selecting it from version history.
Bonus
Enable the option to show only named versions.
