Multiple Choice with Google Docs

Introduction
Matching assignments are useful as a formative or summative assessment. They assess student knowledge with support from possible answer choices. I use them when assessing basic concepts. They are particularly useful when assessing vocabulary and reading skills.
In this lesson, you will learn to create a multiple choice quiz in Google Docs. We will use a table to organize the questions and choices.
I prefer to use Google Sheets to format the table. Sheets has a set of tools that makes this easier. Using Google Sheets to format the table frees me up to create the content without worrying about the formatting process.
Use the links below to access the resources in this lesson.
Get a copy of the final product: https://bit.ly/3hn9mmz
Get a preview of the final product: https://bit.ly/3f4BUiC
Copy of the working Document: https://bit.ly/2zvpPE8
Unicode bubble text: https://yaytext.com/bubble-text/
Preparation
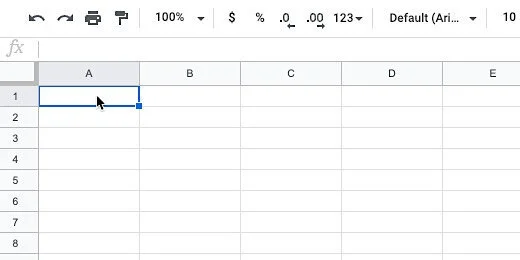
We need to set up a few things. Create a new Google Document. Set the margins all the way around to a half-inch. Add another tab to your browser. Create a new Google Sheet.
I like letter choice options for students. They type the letter into a blank space next to the question or sentence. I like letters that are enclosed in a circle. They look more like the letters in a typical multiple-choice test.
Google doesn’t have a font for these letters, but there is a way to create them with the help of a web site. The link is in the introduction. You don’t have to go back to the introduction. Here is the link for you.
https://yaytext.com/bubble-text/
This website generates a letter inside a circle. Go to the web site and type the letter A in the input box. The letter font is generated in several styles. We are using the first style.

Click the copy button.

We are going to create several questions. Returning to this site for each letter gets tedious. I like to work as efficiently as possible. To this end, I use an automation option available in Google Docs.
Return to the Google Doc tab. Click Tools and select Preferences.

Click the substitutions section.

Click inside the first field on the right. Paste the character. This character replaces another character or characters we type.

Click in the field on the left. Type an open parenthesis followed by the letter a. Leave the substitute preferences open and return to the website tab.

Replace the letter A with B. Copy the character. Return to the Google Doc.

Paste the character into the box on the right. Type (b into the substitute field. Repeat this process for the letters c, d, and e. Add more letters if you need them.

I chose the open parenthesis followed by the letter because I am not likely to type this combination in the future. You can disable the replace option for these characters by removing the checkmark from the box.
These character substitutions are part of the global Google Docs preferences. They are available for all new and past documents.

Questions and choices
During the creation of each question, we are going to include special characters. These special characters will help format the table later. The character allows us to separate the text into table columns. We can use any character. I like to use a character that is not likely to appear in my question or answer choice.
I like to use the Pipe | character. It is rarely used so I like to use it for special applications. The Pipe character is on the key with the backslash (\) character. The pipe character also resembles columns.
The first question begins with a number followed by three Pipe characters. This represents three columns. The number is part of the first column. The question is part of the fourth column.

Press the Return key and begin providing the answer choices. The answer choices begin with three Pipe characters. Type a space followed by the substitution character for the letter A. An open parenthesis followed by a lower case A. Press the spacebar once after the letter to trigger the substitution.

Type the first answer choice. Press the spacebar. Type the Pipe character. Type the substitution characters for B.

Repeat the process for the remaining answer choices.

Press the Return key twice before beginning the next question. The sentence in the next example includes a period after the number. I did this for those that want to include a dot after the number. It does not affect the formatting.

In question three I added space after the number and before the question. This makes the document easier to read. Repeat the process for all the questions in the assessment.

Substitution tip
Sometimes I forget to type the Pipe character before the letter of the second choice. I updated the substation preference to include the pipe character when I use the letter b, c, and d. It saves me a step.

There is one more trick. Use one substitution for all the answer choices. I created a substitution with open parenthesis followed by the letter abcd. Make sure to include a space between each letter. Click once after each letter and type the answer choice.

Can you come up with other shortcut options?
Table conversion
Select all the questions and choices. Copy them.

Go to the tab with the Google Sheet. Paste the contents into the first cell.
The pasting process selects the rows with content. Make sure it remains selected.

Click Data and select Split text to columns.

We are prompted to select a separator. The separator is our Pipe character. Click the separator selector.

Our Pipe character is not one of the separator options. Select the custom option.

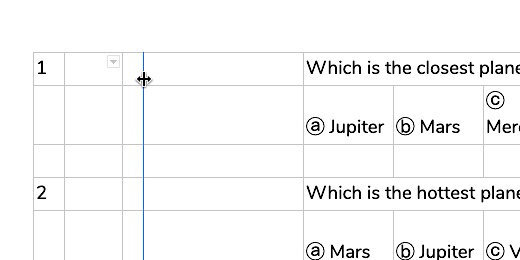
Type the Pipe character into the custom field. Sheets immediately recognizes the character and splits the text into columns.

Each question is split across several columns. We need to merge the columns for each question into one. Select all the columns that are part of the longest question. The longest question in my example is question 6. It extends to column H.

Click the Merge button.

Select the next question and click the merge button. Repeat the process for all the questions.

Select all the columns and rows with questions and answer choices. Click Edit and select copy.

Switch over to the Google document tab. Select everything and delete it. Press the Return key two or three times. Paste the Google Sheets content. You are prompted for a paste option. Select the option to paste unlinked.

The table needs some formatting.

Click Edit and choose Select All.

Select a font for the questions and answers. I like to use Nunito font. I also like Comfortaa font. They are easy to read. Select the 12 point font size. Click the Left Align button. Click once on the document to deselect everything.

Click and drag the right number column border inward. Move it close to the numbers but don’t crowd them.

Drag the answer space border to the right. Leave enough space for students to type the letter answer.

Drag the question border toward the left. This is the spacer. I use it to increase the space between the answer and the question.
Drag the first answer choice border to the left. Make sure there is room for the longest answer.

Select the row with the first answer choices.

Right-click in the row. Choose Distribute columns.

Right-click somewhere on the table. Choose Table properties.

Choose black for the border color. Set the border size to zero points.

Make sure the cell vertical alignment selection is Bottom. Click the OK button.

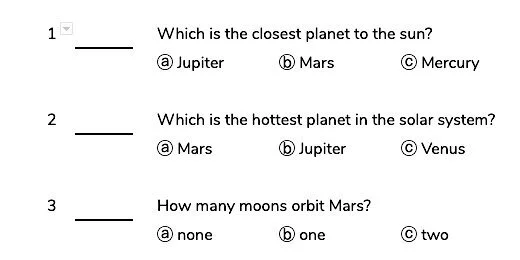
It’s starting to look like a multiple choice quiz.

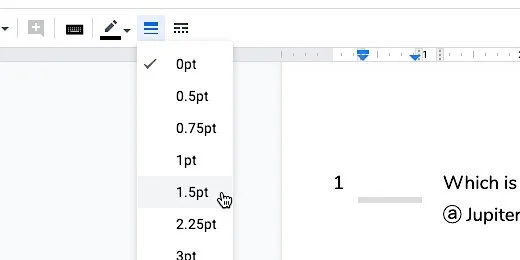
Click between the number 1 and the question. A border selector displays to the right of the cursor. Click the selector.

Choose the bottom border option.

Click the border thickness selector. Choose 1.5 points.
Repeat the process for the rest of the questions.
Add a title to the document and make it look nice.

This is your master document. Make a copy for students.

Update the name for the student copy.

Return to the original document. Update the name to identify it as your master document.

Set Master Version
Use this document with students in the class. Use it to review the answers. Set this document as your Master and your Answer key. Click File and go to the Version history option. Select Name current version. Type Original and click Save.

Answer key
Enter the correct answer for each question. Change the answer color to red.

Name this version of the document Answer Key.

Selecting a version
Click File and go down to version history. Select see version history.

Click the option to show only Named versions. Select the Original version.

Click the Restore this version button.

Repeat this process and choose the Answer Key version to see the answer key.