Weather Station Project: Lesson 5

Introduction
In this fifth lesson, we will create a Google account. The account is necessary to create and enable the APIs for our project. An Application Program Interface provides a way for us to access Google services. We need access to our Google Sheets account. We also need access to Google Drive. The access permits the Python program on our Pi to send information to a Google Sheet. Google provides a special file. This file is used by our script to access the Google Sheet for our project.
Google account and API
In the previous lesson, we connected the sensor to the Raspberry Pi. The Pi is collecting temperature and humidity information from the sensor. The sensor is queried every thirty-second. This information is displayed on the terminal window.
The data collected from the sensor is temporary. We need a way to collect, store, and share the information.
Google Sheets provides an easy way to share data with the world. Google has services called APIs. An API is an Application Program Interface. It provides a way to gather information from an application like Python. It shares the information with Google applications. That application is Google Sheets in our project.
The API services are free to anyone with a Google account. We need to enable and configure the services before using them. The first step is to create a Google account if you don't have one. Go over to https://accounts.google.com/signup to create an account. Log into the account.
We need to enable and set up our Google API. The API will provide the information we need in our Python code. Go over to https://console.developers.google.com. A welcome message will appear on your first visit to the developer's console. Agree to the terms and conditions and continue.

We need to create a project. Click the Project selector.

A box will open so we can select a project. Click the New Project button.

A new project page opens and suggests a name for the project.
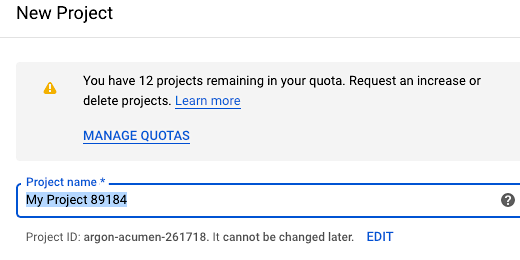
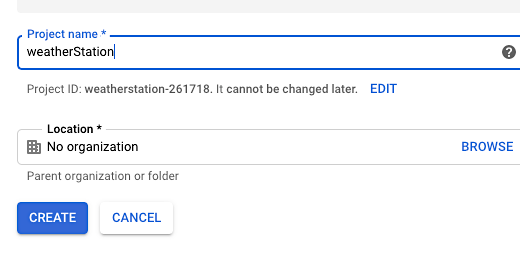
Erase the suggested name and type weatherStation. I don't include spaces in the name on purpose. The project will eliminate the spaces for us. I like to choose how the name will appear when created.
The first letter of the first word is lower-case. The second letter of the second word is upper-case. This is a format for creating names in coding. The format is often referred to as Camel Case. Click the Create button. Don't worry about the organization's information.
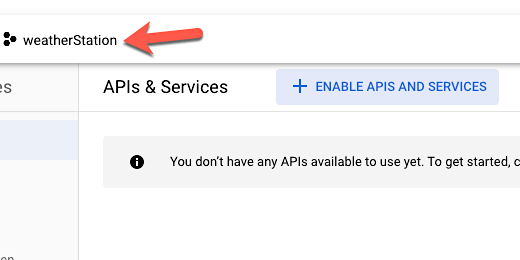
The project page opens after clicking the create button. We need to enable APIS and Services. Click the button to enable these services.
An API library page opens.

Scroll down the page. Look for the Google Sheets API tile. Click the tile.
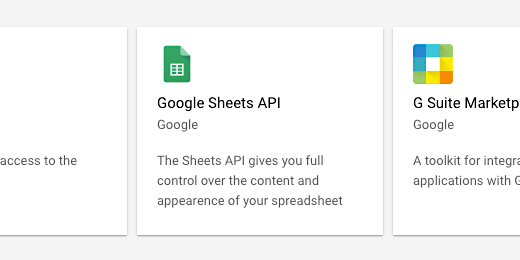
Click the Enable button.

The Google Sheets API is now enabled.

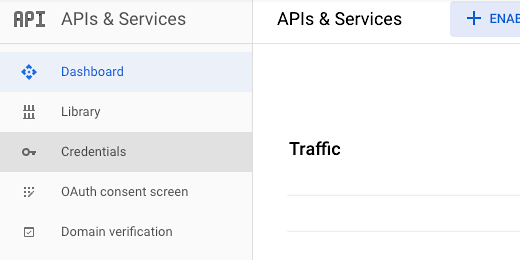
Click the Google API menu. Select the Dashboard from the APIs & Services option.

We need to enable one more API. Click the button to enable APIs and Services.

Click the Google Drive API tile. Enable the Google Drive API. Return to the Dashboard once the Google Drive API is enabled.

We are going to create credentials in our Google Sheets API. These credentials authorize the app on our Raspberry Pi to access a Google Sheet. Select the Credentials option.
Click the Create credentials button.

Select the option to create a Service account key.

Click the Service account selector.

Select the option to create a New service account.

Provide a name for the service account. Enter the name "piweatherStation".

The name is part of a service account that is similar to an email address. The service account ID is piweatherStation@weatherstation. I have hidden the rest of the information for security reasons. The rest of the address includes numbers and letters. It ends with the .com extension. We will need this information later.

Click the Role selector and choose Editor from the Project option. Click the create button.

A file is created with the credentials information. This file is downloaded to your computer. It downloads right away on the Chrome browser. Other browsers will prompt you to confirm the download.
An information message appears on the page. Close the message. The information in this file is for your account and Sheets API. Don't share it with anyone.

The JSON file is an acronym for JavaScript Object Notation. This file allows us to access the Google Sheet and send it information from our weather station. Create a folder on your computer desktop and title it "weatherFile". Place the JSON file inside this folder.
Chromebook users will create a folder in the download folder and leave the file here for now.
Don't close the Google Developers Console. We need information for one of the steps in the next lesson.
Weather datasheet
Our next step is to create a spreadsheet to receive the data. Open a new tab. Go to https://sheets.google.com. Click the Blank tile to create a new empty spreadsheet.

Click in the untitled spreadsheet name. Name the spreadsheet "piweatherData".

I know we are not including spaces in our files. Using this naming convention makes things so much easier later.
We need to share this spreadsheet with the API account we created in the last lesson. Click on the Google Developer's Console tab.
We are going to drill down from the beginning to get the information we need. I am doing this for those of you that might have closed the tab. I also want you to know where the information is for future reference.
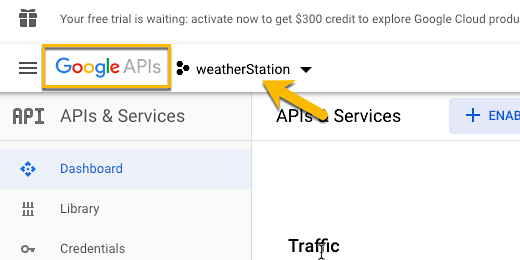
Go to https://console.developers.google.com and login if requested. Click on Select a project. The link is next to the Google APIs logo.

If you didn't log out then you will see the weatherStation project in the project selector. Click the weatherStation API link.
Click the weatherStation project API link.

We are taken to the weatherStation Dashboard. Click on the Google Sheets API link at the bottom of the dashboard page.

Click the credentials link.

Look for the service account piweatherstation email account. Click on the link to open the account settings.

The email appears on the settings page. Highlight the email. Right-click and copy the email.

That's all we need for now. Return to the Google Sheets we just created. Click the Share button.

Right-click inside the email field and select paste.

Leave account with edit permissions. Click the send button.

We are done with the APIs and Google Sheets setup. We will return our attention to the Raspberry Pi in the next lessons. Keep the JSON file on your desktop on Chromebook download folder. It will be used in the following lessons.