Weather Station Project: Lesson 3

Introduction
In these lessons, you will learn how to
Find the Raspberry Pi’s IP address
Login into the Pi with SSH
Update the Pi location and time zone
Update the Raspbian operating system
Install applications and services
Shutdown the Raspberry Pi
Raspberry Pi connection
The Raspberry Pi has connections for a display. The USB ports are used to connect a keyboard and mouse. The weather station does not need a display, keyboard, or mouse. For these lessons, we are going to connect a display. This gives us a sense of what is going on. It is useful for first-time users to get some visual feedback. Connect an external display to the Raspberry Pi with an HDMI cable. Don't connect a keyboard or mouse.
We are going to run the Raspberry Pi in what is called the headless mode. This means we are not going to physically connect to the device when working with it. We are going to log into the Raspberry Pi from another computer. This is very useful because we can use any computer. The Pi will be controlled by your Mac, Windows, or Chromebook. I have instructions for each.
If you are using Raspberry pi (version 1.xx or 2.xx) without wireless capabilities you need to connect it with an Ethernet cable to a router. The Ethernet cable usually connects to a drop. This is a port on the wall. The cable is also connected to a Router. Below is an image of a wireless router and the Ethernet ports on the router. Raspberry Pi 3 and 4 with wireless capabilities don't need an ethernet cable.

Use the power adapter that came with the Raspberry Pi kit. Plug the adapter to a wall outlet. The Raspberry Pi doesn't have an independent power button. It will turn on once the Pi is connected to a power source. Plug the other end of the power adapter to the Raspberry Pi micro USB connector.

Don’t unplug the Raspberry Pi until everything is setup. Unplugging will turn off the power and crash the computer. You might need to start all over. At the very least, you will need to connect a keyboard and mouse to the Pi and fix some issues.
A couple of lights on the Pi will turn on. A red LED indicates the Raspberry Pi is on. A blinking green LED shows there is activity on the Pi. This activity is usually from the Pi reading and writing information to the micro SD card. The green light will blink for a few minutes while the Pi boots. Eventually, the LED will stop blinking. This means the Pi is waiting for instructions from us.
What do we see on the connected display? The Raspberry Pi displays lines and lines of text as it boots. It configures everything for us. It looks for the SSH file to setup SSH services. It looks for the WPA file to set up the wireless connection. If the green LED doesn't blink and nothing appears on the display this may be because the microSD card isn't properly inserted. Check the card to make sure it is properly inserted.
Unplug the power supply to the Raspberry Pi before checking the microSD card.
Raspberry Pi IP address
We need to know the IP address for the Raspberry Pi. This is needed to log into the Pi with Secure Shell, SSH. I reviewed the process for getting the IP dress using Mac, Windows, and Chromebook. All three use their version of the command line.
Mac Terminal IP address lookup
As long as your computer is part of the same network we can look up the IP address of the Raspberry Pi. Open the Terminal on Mac or Windows and type this command, ping -c 3 raspberrypi.

This command sends a chunk of information to the host identified as raspberrypi. It looks for this host on the local network. Once it finds the host it sends information to confirm the host is communicating with the network. The ping identifies the IP address of the host. The IP address for my Raspberry Pi is 192.168.1.63. Look at the IP address for your Pi and write it down. There is a parameter between the ping command and the hostname. This parameter instructs the ping command to limit the pings to three.
The IP address will change if you move the Raspberry Pi to another location. If you do move it, run the ping command to get the new IP address. You will be moving the Pi to gather temperature and humidity information from various locations.

Windows IP address lookup
We are using the command line again to get the IP address of the Raspberry Pi. This IP address is needed so we can log into the Pi with SSH. Go to the Windows search box and type CMD to open the command line. Type ping raspberrypi.

The command will ping the network looking for the host named raspberrypi. It will send packets of information to confirm that the host is communicating. The ping command will send four packets. The IP address of the Raspberry Pi is returned. The IP address for my Pi is 192.168.1.63. Get the IP address for your Pi and write it down. You will need it in the next lesson.
Chromebook IP address lookup
The Chromebook has a version of the command line called the Chrome Shell, Crosh. Use the keyboard combination CTRL+ALT+T. A tab opens and displays the Chrome Shell prompt.

Type ping -c 4 raspberrypi. We need to enter a count for the number of pings. The command will continue to ping the Pi until we interrupt it with CTRL+C.
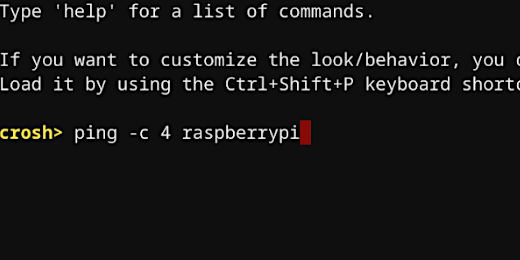
The ping command will look for the Raspberry Pi with the hostname "raspberrypi". It will send four packets to the Raspberry Pi. This tests the Pi's ability to communicate on the network. Part of the information returned includes the IP address for the Pi. The IP address for my Pi is 192.168.1.63. Look for the IP address of your Pi and write it down. We will need it in the next step.

During these lessons, I will use the IP address for my Pi. Please replace my IP address with the one for your Pi.
SSH Mac Login
To access the Pi we will use the SSH connection. The Pi is connected to our router and has received an IP address from the router. This is true for both the wireless and ethernet connections. The Raspberry Pi will be assigned an IP address. An IP address is a set of numbers divided into four sections of three numbers each. A typical router address looks like this, 192.169.001.122. The IP address provided to the router is unique. We need to find the address assigned to your Raspberry Pi.
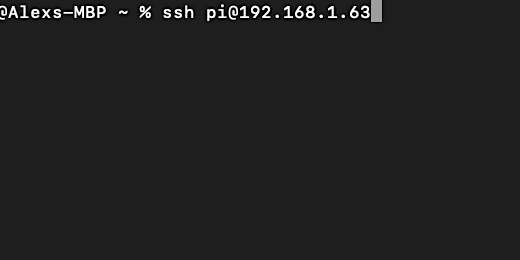
Type clear at the prompt. This clears away the information in our terminal. Type ssh followed by a space and the word pi. We are opening the ssh application to login to the Pi account. This is the default account. Type the "@" symbol. Enter the IP address for your Raspberry Pi after the "@" symbol. We are instructing the SSH application to access the device at the given IP address. It will then attempt to log in with the account name "pi". Press the Return key.
The Raspberry Pi will reply to your attempt with a password prompt. The password for all new Pi accounts is “raspberry”. The password information is hidden so you won’t see the letters as they are entered. Type the password and press the Return key.

You will see the Raspberry Pi Raspbian command prompt. The latest version of macOS might return a login attempt error. In that case, you will need to use the command instructions below.
Mac SSH error
We need to clear the ssh keys on the host. Type the command below. Replace the IP address with that of your Pi.
ssh-keygen -R 192.168.1.163
Windows SSH Login
Type “cls” to clear the contents of the command window. Type ssh pi@192.168.1.63 at the command prompt. Replace my IP address with yours.

The Raspberry Pi doesn’t have any security settings enabled yet. You are prompted to confirm the connection. Type yes and press the Return key.

The Raspberry Pi prompts us for the Pi account password. The default password is “raspberry”. Type raspberry and press the Return key to log in. The password is not displayed as it is typed. This is for security reasons. Type it carefully.

The password is authenticated and you are logged in. The Raspberry Pi command prompt is ready for our instructions.

Chromebook SSH login
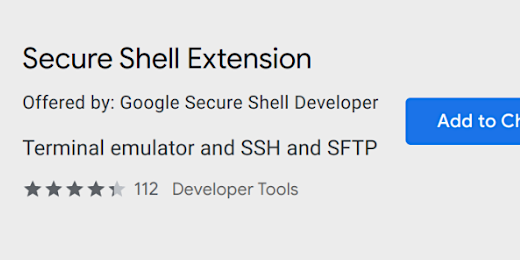
The Chrome Shell does not include the Secure Shell application. We need to install it. It is available in the Chrome Web store. Open the Chrome web store. Search for the Secure Shell Extension. Click the Add to Chrome button to install the extension.
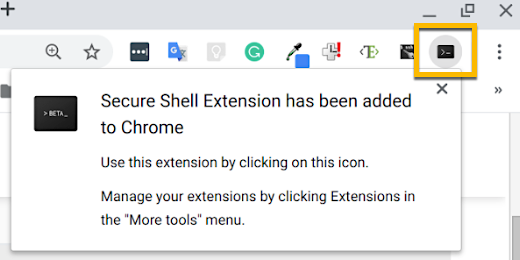
Click the extension icon after the installation is complete.
Click the Connection Dialogue option.

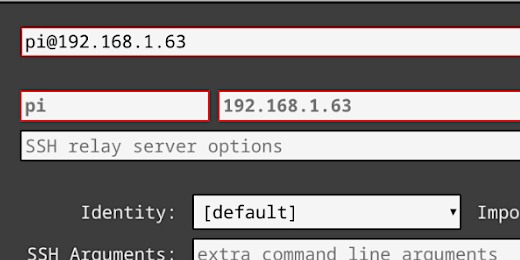
A configuration box opens where we provide the account information needed to log into the Pi.

Type pi@ followed by your IP address into the first input box. The extension fills in the account name and the IP address for the other boxes. Press the Enter key on your keyboard.
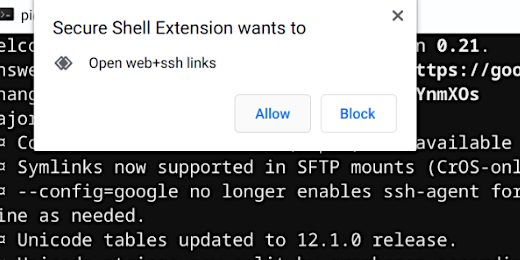
We are prompted to allow the extension to open SSH links. Click the allow button.

We are also prompted to allow the extension to open web and SSH links. Click the allow button.
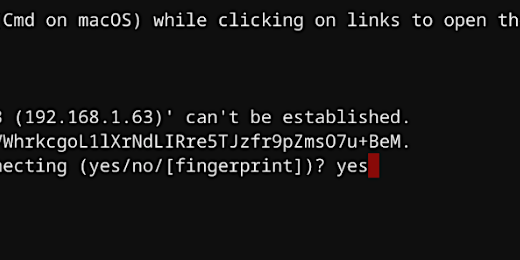
We are prompted to confirm the connection to the IP address with SSH. Type yes and the Return key.
Provide the password for the account on the Raspberry Pi. The password is “raspberry”. The password does not appear as it is typed. This is done for security reasons. Type the password and press the Return key.

The SSH extension updates with the Raspberry Pi command prompt.

The extension remembers the connection information. The extension displays this information the next time we want to connect. You still need to provide the password.

Raspberry Pi password
From this point forward everything will be related to the command prompt. I won't be jumping from computer to computer to explain different methods.
Leaving the default password set to raspberry is never a good idea. The first thing we need to do is change the password. Type passwd followed by a space and the account name pi.

The password doesn’t have to be complex. Use at least eight characters. Write the password down somewhere. We need to verify the password change by entering the old password. This would be the current password, raspberry. Type the current password when prompted.

The password will not be displayed as it is entered. Type in a new password. Press the Return key to update the password. You will be prompted to type the new password again.

Raspbian is constantly being developed and updated. Those updates aren’t always included in the installer. We need to check for updates and install them.

You might have the Pi connected to an external display. This was useful when the Pi booted. Since then the display has been silent. This will be true for the remainder of our lessons. Keep it connected for the remainder of these lessons. The final lesson covers the process of shutting down the Pi.
Configure services
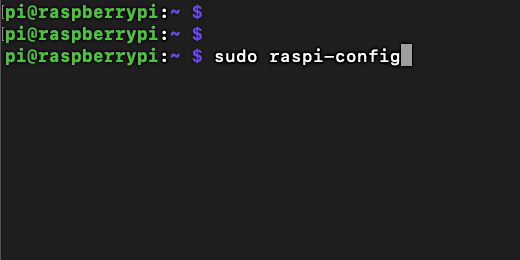
We need to configure some basic services before proceeding to the next step. Type sudo raspi-config followed by the return key.
Instead of repeating the instruction to hit the return key, hit the return key after a command-line instruction.
The configuration tool is very useful. The top of the tool panel provides information about the model and version of the Raspberry Pi. The configuration tool provides a list of settings and services we can change.
Set location and time
The Raspberry Pi doesn't get and set the date and time information for the location. We need to set this manually. This information is important for sensor data. Use the down arrow key to select the localization options. Press the Return key.

Press Return to set the location information. The terminal will go blank for a few seconds. The Pi is retrieving the needed information.

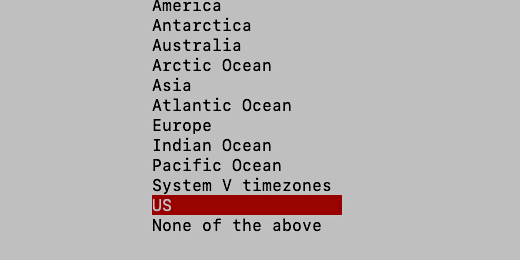
A list of locations is displayed. The locations are listed in the UTF-8 format. The UTF-8 format lists the location language followed by the territory. For example, en_US is for English and United States. Select the UTF-8 for your language and country. Press the space bar to select the location. An asterisk appears in the location square.

Press the tab key to jump to the OK. Press the Return key to update the location.

You will be prompted to select a language region if applicable. In this example, I am prompted to choose between British English or American English. Select a regional language and press the Return key.

The process could take a minute or two. The terminal will update with process information.

The main menu appears when the process is complete. Select the localization options again. We are going to set the time zone next.

Select the option to change the timezone.

Use the up or down arrow key to select your country. Press the Return key.
Use the arrow keys to select your time zone. Press the Return key to mark the time zone.

The main menu will return once the process is complete.
Hostname
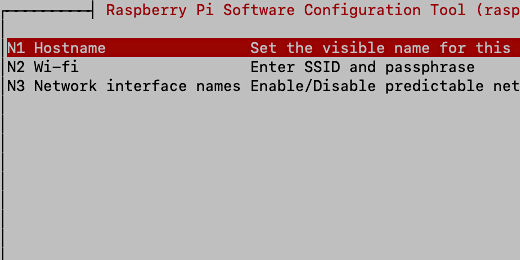
The hostname for the Raspberry pi is "raspberrypi". This is the hostname we pinged to discover the IP address. We must change the hostname. There are several reasons for changing the name. One reason for changing the name is that others on your network might need to set up their Raspberry Pi. Pinging the hostname "raspberrypi" will return several results. One of them is your Pi. Changing the hostname will prevent them from getting a ping from your Pi. Select network options.

Select the hostname option.
An information box provides important information regarding hostname options. We can only use letters and numbers in the hostname. A hyphen is also allowed. Press the Tab key and the Return key to continue.

The current hostname appears. Press the delete or backspace key to erase the name. Provide a name that is relevant to the Pi.

I recommend changing the hostname to "weather-pi". I use the hyphen to separate the words. Blank spaces are not allowed in hostnames. Press the Return key to update the hostname.

Press the tab key twice to select Finish. Press the Return key.

Changing the hostname requires a reboot. Proceed with the reboot. You will need to log back into the Pi after it has rebooted. Use the SSH terminal, command prompt, or extension on Chromebook.
Raspbian Updates
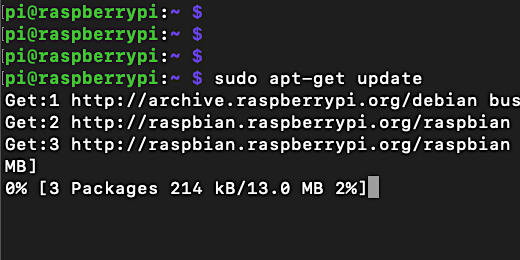
We need to check for available updates. The updates are available from a repository common for many versions of Linux. Raspian is a version of a Linux distribution called Debian. The repository of updates for Debian is maintained by the Linux community. Type sudo apt-get update.

The installation of updates often require administrative level permission. The term "sudo" is used to perform updates, installations, or changes as the administrator of the device. The term stands for Super User Do. Super User is another term for the computer administrator. By typing the "sudo" command we are instructing the operating system to look for updates.
The updates are retrieved and installed using "apt" service, the Advanced Packaging Tool. This application is used to update and install packages. After "apt" is a hyphen followed by the word get. This instructs the packaging tool to get the available updates for Raspbian.
The APT application connects to the repository of services for Raspbian. It begins to download a series of packages. These packages contain instructions and information for the updates available. Think of it as a list of items available for installation on Raspbian.
The process is fast. The list is ready to begin retrieving and installing updates.

To install the updates type sudo apt-get upgrade. This instructs the package tool to upgrade all the services that need upgrading.

The upgrade process takes several minutes to complete. The terminal will scroll with lines of information. This information represents the services and applications that are being upgraded. The upgrade tool on my Pi will upgrade 63 services and download 149 MB of files to perform those updates. The number of services and file sizes may vary on yours.
Before the upgrade begins we are prompted to confirm the upgrade process. Type the letter Y and press the Return key.

You can step away from the computer for the upgrade process. Return after five or ten minutes to respond to a message that will appear somewhere in the process. Type q to finish the upgrade process. You might receive other prompts. It depends on the upgrades. You might need to type yes to another prompt.

If you are looking at the Raspberry Pi on a display then all you will see is the Raspberry Pi login prompt. All the action is going on in the terminal window.
Type clear at the command prompt after the updates are done. This will clear the terminal window for the next steps.
Python and Google Services
In a future lesson, we will set up Google APIs to collect information from the weather station. To send information to the Google API for Google Sheets we need to set up applications and services.
We are using Python, a programming language to communicate between the Pi and Google’s API. We are going to update Python and some of the services. The update process is similar to the update for the Raspbian operating system. These updates don’t take as long as the updates we just performed.
I want to make sure we have them installed with the latest updates. This process is useful so that you understand what services are being used and how they got there.
Python updates
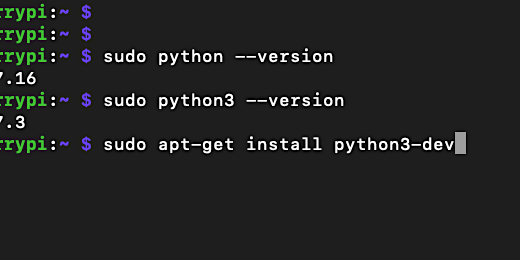
Python is a popular programming language. Versions 2 and 3 are installed on our Pi with Raspbian. Type sudo python --version. This shows version 2.7.16 is installed on my Raspbian.

We are going to use the latest version of python. Type sudo python3 --version. The version installed on my system is 3.7.3. Yours might be newer.

We need to install some additional packages for Python. Type sudo apt-get install python3-dev. This command is similar to the update command. This command includes the install parameter. The APT package tool will download and install the Python 3 development files.
Type the letter y to confirm the installation of the Python 3 development packages.

We will install the Python Package Index. This is a package manager for packages written in Python. Type sudo pip apt-get install python3-pip. Type the letter y when prompted to continue with the installation.

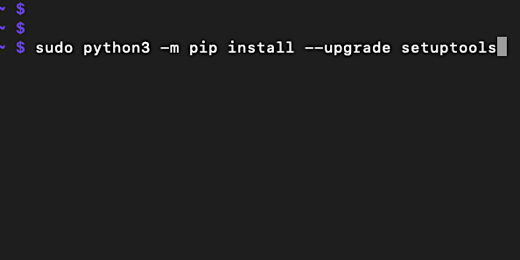
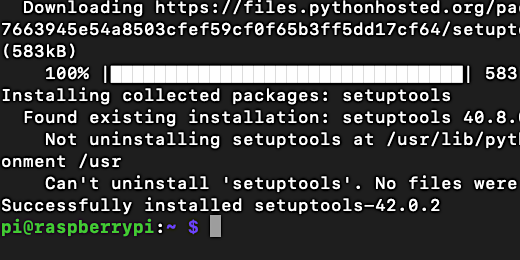
I want to make sure other Python services are up to date. Type sudo python3 -m pip3 install --upgrade setuptools. This time we didn't use the apt-get command. Python has services through PIP to get and install packages. Type y at the prompt to confirm the setuptools update.
Python will search for any updates to the setuptools. It will install those updates if any exist. The terminal window might not display any text for a while. This is normal.
Type sudo python3 -m pip install --upgrade wheel. With this command we are now finished with our updates for Python 3. In the next step, we will install Google services for Python.

Google Services for python
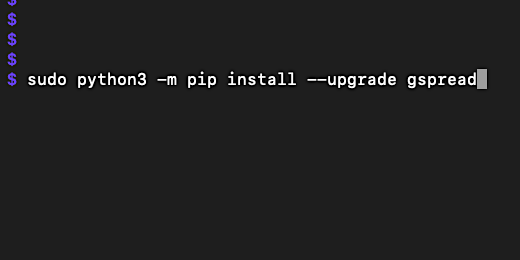
Go ahead and type clear to refresh the terminal window. Type sudo python3 -m pip install --upgrade gspread. This instructs the Python package installer to locate and install the gspread package.
After a few seconds, you will see the installation progress.

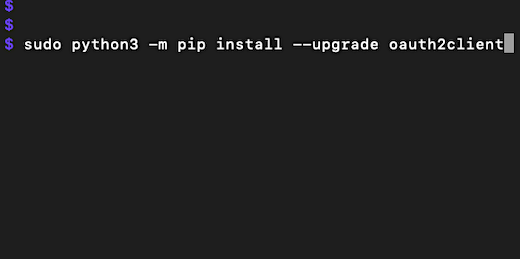
The “gspread” packages and Python need to communicate with the Google Sheets API. Communication takes place over secure services through Google. This installs a client package that is used to authorize our access to the Google Sheet. We need to update the secure services on our version of Python. Type sudo python3 -m pip install --upgrade oauth2client.
We need one more package to access the Google Sheet API. Type sudo python3 -m pip install --upgrade PyOpenSSL. Google uses secure services for all its products. This is easily identified by the ‘https://“ and the lock icon in the address bar. The Open SSL package allows us to access these services.

Shutdown
We are done with everything for these lessons. We need to turn off the Raspberry Pi. The Pi is like all computers. It needs to shut down before disconnecting.
Type ‘sudo shutdown -h now’ and press the Return key.
The display connected to the Pi shows information related to the shutdown process. It is terminating applications and processes. It is also closing files and removing unneeded temporary files.
The whole shutdown process takes a few seconds. The terminal window will display a message informing you that the SSH session is closed. You are logged out of the Raspberry Pi and the SSH application on the Pi has stopped accepting requests.
Disconnect the micro USB cable from the Pi.
Practice booting the Pi and shutting it down. This will give you a sense of how long it takes the Pi to boot and shutdown.