Micro:bit timer

Timer
In this lesson, we are going to work on a countdown timer. The timer will count down in seconds, but it can be used for minutes too. We will develop an interface to set the timer value with the A and B buttons. The shake option will be used to reset the timer. We will include a countdown tone.
The code for the finished project is available from Make Code and my Github repository; use the links below.
Make Code: https://makecode.microbit.org/_8zzFXgfdg2VM
Github: https://github.com/digitalmaestro/timer
Micro:bit simulator and Make Code
You don’t need a Micro:bit to follow along in the lesson. Make Code offers an Integrated Development Environment, IDE, for the Micro:bit. The IDE includes a Micro:bit simulator. Use the link below to access the Make Code website. You don’t need a login account.
https://makdecode.microbit.org
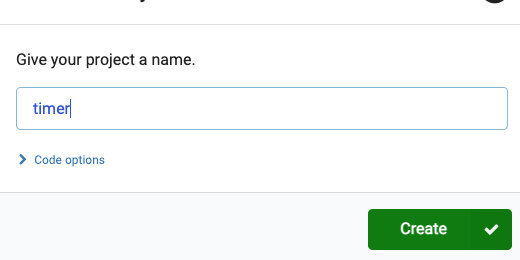
Click the New Project button.

Use “timer” for the project name; click the Create button.
Every new Make Block Micro:bit project includes two code blocks. The [on start] code is used to run code the moment the Micro:bit is connected to a power source or restarted. The [forever] code is part of a function. Code in [forever] is part of a loop that repeats as long as the Micro:bit is connected to a power source.
We don’t need the [forever] function for our project. Take the code block and drag it to the Codes section. Release the block when a Trash Can icon appears.

Basic intervals
We are going to create the timer so that pressing the A and B buttons will allow us to set the timer value. Go to the Input section; find the [on button A pressed] function.

Place the code block on the coding canvas.

We need some variables to store the timer values. Select the Variables section; click the “Make a Variable” button.

Use “intervalOne” for the variable name; click the OK button.

Three code blocks are available for every variable we create.

Get the [change intervalOne by 1] code block; place it in the [on button A pressed] function.

Go to the Basic code section; find the [show number] code.

Place the [show number] code into the [on button A pressed] function and below the variable block.

Select the Variables section. Get the [intervalOne] variable; place it into the [show number] parameter.

This is the basic code for increasing the timer by one unit at a time.
Go to the Simulator section and press the A-button a few times. The value should increase by one each time the button is pressed.

Let’s set up the other button to increase the timer value by 5 at a time. This will save us button presses when we need to set a timer for 10, 15, or more. We will combine this with the A-button to give us other timer values.
Intervals by five
Go to the Input section; get another [on button A pressed] code. Place the code on the coding canvas. The function is faint and a different color. This happens when two button functions are on the canvas for the same button.

Click the button selector; choose button B.

Go to the Variables section; click the “Make a Variable” button. Use “intervalTwo” for the variable name.

Get the [change interval… to ] code block and place it into the [on button B pressed].

Click the variable sector. Choose the [intervalTwo] variable if it is not already selected.

Change the variable interval from one to five.

Get the [show number] code block from the Basic section; place it after the change variable code.

Place the [intervalTwo] variable into the [show number] parameter.

Go to the simulator and press the B-button a few times. The numbers on the display should increase five at a time.

Combining values
The values generated by the A and B buttons are working independently. We need to store the values generated from each button and add them together. We need another variable.
Go to the Variables section; create a new variable. Use “totalTime” for the variable name. Get the [set totalTime to] code block; place it after the [change intervalOne by] code block in the [on button A pressed] code.
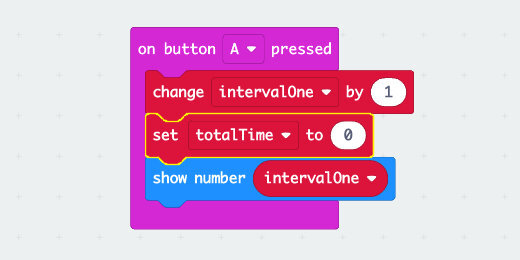
The [totalTime] variable will store the sum of the intervals selected using both the A and B buttons.
Go to the Math code section; find the Addition operation.

Place the Addition operation into the [set totalTime to] parameter.

Go to the Variables section. Get the [intervalOne] code; place it on the left side of the Addition operation.

Get the [intervalTwo] code; place it on the right side of the Addition operation.

Use the variable selector in the [show number] code; choose the [totalTime] variable.

Go to the simulator; press button B once. Press button A two or three times. The values from buttons B and A are added and displayed.

Functions
We need the same cone for button B. Whenever we have code that repeats it is standard to create a Function for that code. The function of our code is to add the value of the buttons pressed for a total timer value.
Select the Advanced code option; select the Functions code section.

Click the “Make a Function” button.

Click inside the function name.

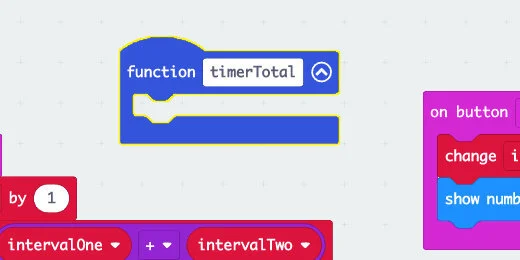
Use “timerTotal” for the function name; click the Done button.

The function is placed on the canvas with the rest of our code.
Select the [set totalTime to] code and pull it away from the button function. The [show number] code will be moved too.

Place the code blocks into the [timerTotal] function.

We call the function from the button-pressed code. Select the Function code section; look for the [call timerTotal] code block.

Place the code into the [on button A pressed] and after the [change intervalOne by 1] code.

Get rid of the [show number] code from the [on button B pressed] function.

Insert the [call timerTotal] function into the [on button B pressed] code.

Checking the function
Go to the simulator and press both the A and B buttons. The value on the display will update with the total.
Start the countdown
Once we have the total time for the countdown, we need to begin the countdown. The countdown will be started by pressing both buttons.
Go to the Input section; get an [on button A pressed] code block and place it on the canvas. Use the buttons selector and choose A+B.

Pressing the A and B buttons will begin the countdown process. The countdown uses a loop. There are several ways to use loops. In this program, we want the loop to continue the countdown as long as the countdown value is greater than zero.
Go to the Loops section; find the [while True do] loop.
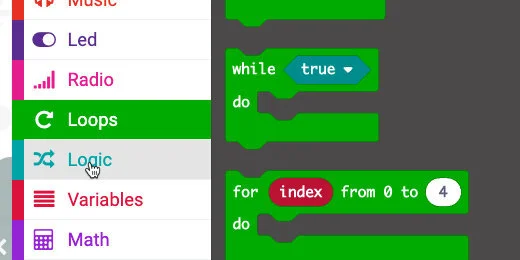
Place the loop inside the A+B button code.

The While loop repeats everything inside the loop while some condition is True or False. In this project, we want the loop to continue as long as the countdown timer is greater than zero. This is a True condition.
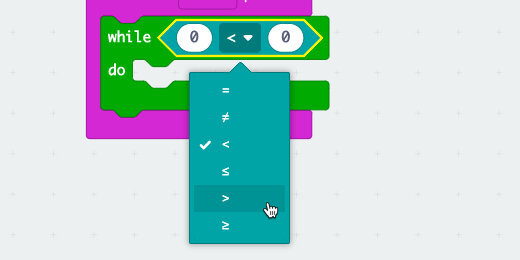
To evaluate if something is True, we need a comparison code block. Go to the Logic section; find the Less-then code block.

Place the code block into the While loop parameter.

Click the comparator selector; choose the Greater-than option.
Place the [totalTime] variable into the left side of the comparator.
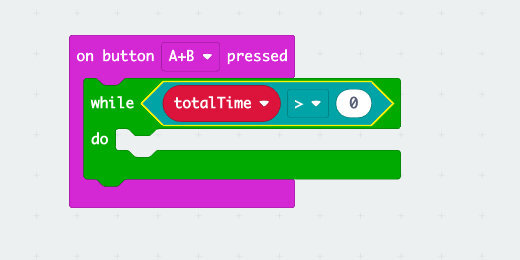
Place the [show number] code block inside the While loop. Get the [totalTime] variable and place it into the [show number] parameter.

Get the [pause] code from the Basic section; connect it to the [show number] code in the loop. Change the pause duration to 1-second.

Get the [change totalTime by] variable block; connect it to the [pause] code. Change the value from a positive one to a negative one.

Test the timer
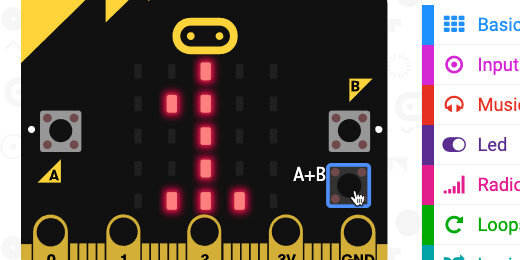
Go to the simulator; press button B once and button A twice. This creates a seven-second timer.

Click the A+B button. The timer counts down and stops at number one.
This happens because the loop is instructed to repeat the process as long as the [timerTotal] is greater than zero. Change the comparison operation; select Greater-than or Equal-to.

Set a timer value of your choosing: click the A+B buttons. The timer will countdown and stop at zero.

Set the startup variable values
It’s a good idea to include a way to reset the value without pressing the reset button on the back of the Micro:bit.
Before creating the reset code, we need to set the start-up values for all the variables. Setting the initial values for variables at the beginning is always a good idea.
Go to the Variables section. Place a [set variable to] code block into the [on start] section for each variable. Leave the value assigned for each at zero.

Place a [show number] code block after the set variables code blocks. Place the [totalTime] variable into the [show number] parameter. Place a [pause] code block after the [show number] code; set the pause duration to 500ms. Place a [clear] screen code block after the [pause] code.

This is the same code we are going to use when resetting the timer. We are going to reuse code; this is an indicator that we need a function.
Reset function
Go to the Functions section; click the Make a Function button.

User “clearTimer” for the function name; click the done button.

Get all the code blocks from the [on start] section; place them into the [clearTimer] function.

Click the chevron next to the function name. This collapses the function. The function works in the same way, but all the code is neatly tucked away inside.

Get the [call clearTimer] code; place it into the [on start] section.

Reset on shake
Go to the Input section; find the [on Shake] code block.
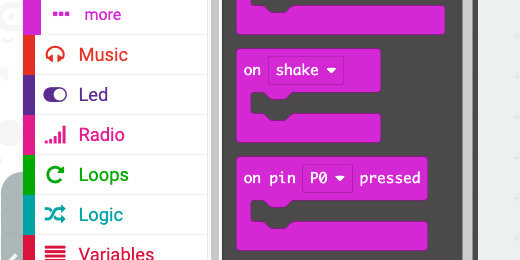
Place the [on shake] code block on the coding canvas. Get a [call clearTimer] block and place it into the [on shake] code.

Test the shake function
Press the B-button three or four times; click the Shake button.

Recall timer value
When using the timer we may want to check the value one more time. The timer value has disappeared from the screen. We need a way to recall the information. The problem is that we have run out of buttons on the Micro:bit. Micro:bit version 2 uses the logo as a contact button. The contact button in version 2 is like the contacts at the bottom of the other Micro:bits. We will use contact number 2 as a contact button.

Go to the Input section; find the [on pin 0 pressed] function. Place the function on the coding canvas.

Click the pin selector; choose pin P2.

We don’t need to create any code to display the timer value. We already created that code and put it in the [timerTotal] function.

Place the [call timerTotal] code into the [on pin P2 pressed] function.

Set a value in the Micro:bit simulator.

Click the P2 contact. It works as a button now.

The contact will change color to show it has been clicked. The value will scroll across the display.

Sound
Version 1.3B and 1.5 of the Micro:bit don't include a speaker. To use sound with these Micro:bit versions, you will need to connect a small speaker.
You can use a larger speaker if you don’t have small speakers. The Micro:bit does not put out enough current to power large speakers. The speakers need to be powered by an external source. There are plenty of portable speakers available on the market. The speakers need an input jack for connecting a 3.5mm stereo cable. These cables have three sections. The sections are separated by a plastic ring. You will need to connect the alligator clips to the first and third sections of the plug. The Micro:bit simulator shows how to connect the clips.
Go to the Music section; find the [play tone Middle C for 1 beat] code block.

Place the code block into the [on button A+B pressed] function. Place the code block after the [show number totalTime] code.

Change the beat from a Whole note to a Quarter note.

Click in the Tone parameter; select Middle-A using the virtual keyboard.

The Micro:bit simulator shows how to connect the audio cable with alligator clips.

Use the simulator to set a timer and test the code using sound.
Download the code to the Micro:bit and start using the timer.
Seconds to minutes
The timer counts down the value we choose in seconds. We may want to use minutes instead of seconds. The Pause code uses milliseconds. One thousand milliseconds is one-second. Sixty-thousand milliseconds is one minute. Enter this value into the [pause] code.
