Weather Station Project Lesson 1

Introduction
This project is much longer than some of my other projects. It is also more technical than others. This project is something I always wanted to do in my classroom. It is also something I wanted to provide during professional development. At the time I lacked the resources and time to produce the product. The availability of inexpensive computes and components makes this project possible.
We will develop a basic weather station. The station will collect temperature and humidity information. The information will be published to a Google Sheet. The information in the form of data will be graphed with charts in Sheets. The charts will be published using Google Sheets and Google Sites. This provides live updated information from the temperature and humidity sensor.
The resources for this project are relatively inexpensive. You will need a Raspberry Pi to collect and publish the information. You will need a humidity and temperature sensor. Both sensors are in the module. You will also need a Google account.
We are using a basic computer called a Raspberry Pi. The Raspberry Pi is part of a kit. The temperature and humidity sensor is part of a separate kit. I recommend getting both kits. The kit that includes the sensor offers additional sensors and resources. I plan on creating and publishing a variety of lessons using these kits. Several kits provide similar resources. Here are the ones I recommend. I have links to the kits on Amazon. You don't have to purchase the kits from Amazon. The link is here to reference the actual product. The kits are available from their respective providers for education. Contact them for special pricing options. I have a summary of the kits here.
Raspberry Pi kit - The kit contains all you need to get started. Make sure the kit includes the power adapter, microSD card, microSD card adapter, and a case to enclose the Pi. I have links to these kits on Amazon and the Canakit websites. You don’t have to use the kits from these links. Purchase the Pi anywhere you want. Make sure it has the basic parts of the kit that I outlined above. The image below shows the components in the kit.

Raspberry Pi kit
Canakit website: Raspberry Pi 3+ Starter Kit
Amazon: Raspberry Pi 3 B+ Starter Kit
Arduino Kit - This kit contains another device known as a microcontroller. We are not going to use the microcontroller in this project. I will include it in future projects. The Arduino kit contains items we need for this project and future projects. The kit contains the temperature sensor we need. It also contains wires, resistors, and a breadboard needed for the project. The Arduino kit is usually less than half the price of a Raspberry Pi kit. I use the Starter kit by ELEGOO. I recommend the kit from one of the links below.

Elegoo Arduino Starter Kit
Elegoo: Elegoo Uno Super Project Starter Kit
Amazon: Elegoo Uno Super Project Starter Kit
Raspberry Pi version 1.xx and 2.xx users. If you have an older Raspberry Pi then use it instead of purchasing the latest version. These Pi devices did not include wireless capabilities. You will need wireless access to a network. Wireless access allows you to place the temperature sensor anywhere within the sphere of a wireless access point. You will need to purchase a wireless adapter for the Pi. I use and recommend the Edimax EW-7811Un 150Mbps 11n Wi-Fi USB Adapter. It is available from Amazon. It plugs into one of the USB ports on the Pi.
One item that is not on the list but important. You will need a computer and Internet access. You can use any brand of computer and operating system. I recommend a computer running Windows 10, Mac OS, Linux, or Chrome.
Here is another item I recommend. The sensors and the Raspberry Pi are sensitive to static electricity. There is a grounding strap that is used to reduce the risk of damaging the components. The anti-static wrist strap is available from Amazon. It costs a little over five dollars. A worthwhile investment to safeguard a $150 project.
Raspberry Pi Introduction
In this lesson, we are setting up a Raspberry Pi to run our weather station with a temperature and humidity sensor. I am using a Raspberry Pi version 1.2. I am doing this to make sure everything works if you happen to be using an older Pi. The latest Pi version at the time of this lesson is the Raspberry Pi version 4. This version is much faster than the original. All the versions can do the same things. The newer version is more expensive than the Pi 3. This is why I recommended it for our projects and provided the link for it.
Before we being, I want to go over what a Raspberry Pi is and why we are using it instead of a regular computer. A Raspberry Pi is a small computer. It is about a little larger than a credit card. It has a Processing Unit, processing memory, and storage. It does not come with a monitor, keyboard, or mouse. The lack of a keyboard and mouse may seem like a disadvantage. We will soon see they are not needed.
The processor on a Pi is not as fast as a desktop computer. It isn't even as fast as a basic smartphone. It has minimal RAM, Random Access Memory. The latest version has 1-gigabyte of RAM. In contrast to typical computers which include 8-gigabytes of RAM. Storage on the Pi depends on the size microSD card inserted into the slot. The Pi starter kit includes a 32 GB microSD card. Hum, I think that was the storage capacity of my first laptop in 1997.
Pi is small and underpowered in comparison to most modern computers. All that processing power, memory, and storage aren't needed for our projects. This device is not meant to replace your laptop or desktop. Its purpose is to help hobbyists and developers use an inexpensive platform to develop projects. It is often used to prototype much larger products.
The Raspberry Pi is a wonderful device to learn fundamental and advanced computer skills. With a Pi, we can build a web server to host a website. We can build a media center for audio and movies. We can attach electronics and sensors to monitor the environment. We can build on our home webcam. The list goes on and on.
The image of the Raspberry Pi on the page is from a Pi version 3. All the devices are very similar. There hasn't been much of a change physically from the first Pi. The original Pi included 26 GPIO pins. Version 1.2 and later included 40 pins. I'll explain GPIO pins later. Here is a basic overview.

It has four USB ports. These are used to connect devices like a keyboard, mouse, and USB drive.
It has one Ethernet port. This is used to connect the Pi to a network drop or router. Raspberry Pi 3 and 4 include WiFi and Bluetooth.
It has an HDMI port to connect to a display or television. An HDMI port transmits high-quality video and audio from the same port along one cable.
One Micro SD card slot. The micro SD card holds the operating system for the Pi. It is also the default storage location.
One Micro USB power input. The Micro USB port is used to supply power. The power can come from any source that provides 5-volts. This is typically a computer USB port, cell phone wall plug, or power adapter. Your kit came with a power adapter. Make sure to use this adapter. It provides the best performance and won't damaging your Pi.
One 3.5 mm 4-pole composite video and audio port. This is typically used for audio out or to connect a composite cable for devices without HDMI.
One CSI camera port. This port is used to connect an external camera. This camera is similar to the camera on a laptop.
One DSI display port. This port is used to connect to external LED displays. These displays are typically about the size of a small tablet. Some of them offer touch screen options.
40-pin GPIO connectors. This is the key to why we are using the Raspberry Pi. The acronym GPIO stands for General Purpose Input and Output. These pins will connect to our temperature and humidity sensor. They will supply power to the sensor and receive data from the sensor.
The large square chip in the middle is the Broadcom CPU. This is the brains of the Pi. The specifications for the Raspberry Pi 3 B+ are listed below.
Raspberry Pi 3 Model B+ (B Plus) with 1.4GHz 64-bit quad-core ARMv8 CPU (BCM2837B0)
1 GB LPDDR2 SDRAM
Dual-Band 2.4GHz and 5GHz IEEE 802.11.b/g/n/ac Wireless LAN, Enhanced Ethernet Performance
Installing the Operating System
The Raspberry Pi should have been shipped with a Micro SD card. The typical size of this card is 16 or 32 Gigabytes. Either size is more than adequate for the project. The Micro SD card includes an SD adapter. This adapter is there to insert the SD adapter into a computer with an SD card reader. Many computers come with an SD card slot. The Raspberry Pi kit includes a Micro SD USB adapter. It looks like a small flash drive. The micro SD card plugs into the device. The device then plugs into one of your USB ports. This is a USB port on your computer. The microSD card connects to the microSD card slot on the Pi. We need a regular computer to set up the card for use on the Raspberry Pi.
The microSD card includes all the tools you need to get started with the Raspberry Pi. It includes NOOBS. NOOBS is someone new at something. Like a newbie. The tools on NOOBS are wonderful. Most of them are not needed for our project. The NOOBS installation includes the full Raspbian operating system. We are going to install a lite version of Raspbian. Here is the link to the official Raspbian page, raspbian.org. There is thorough documentation on the site if you are interested.
Formatting the microSD card
Doing this step is useful for one fundamental reason. You are going to need to know how to do this at some point. MicroSD cards can fail. Operating systems become corrupt. Systems often crash. Knowing how to reinstall the operating system is crucial in these situations.
I will walk you through the process in complete detail. As always, I assume you don’t have any experience with any of the technology we are using. Feel free to skip the steps you already know. Don’t fail to perform them because they are crucial to the successful operation of our project.
Insert the micro SD card into the adapter that came with your kit. Insert the SD card adapter into your computer. This next step is not necessary but I like to go over the process. We are going to format the micro SD card. I like to do this so you know how to format the card if it becomes necessary. The card is in constant use and it doesn't take much to corrupt the contents of the card. It has happened to me on more than one occasion. Formatting assures we are installing the operating system on a reliable card. The process for formatting the card depends on your computer's operating system. I will go over the process using Windows 10, macOS, and Google Chrome for Chromebook.
The MicroSD card is formatted using the MS-DOS FAT 32 format. FAT stands for File Allocation Table. MS-DOS stands for MicroSoft Disk Operating System.
The terminal
This is the part that might scare some people. We are going to use the command line for almost all of the remaining lessons. With the command line, we don't use the mouse. We don't have a graphical user interface. The terminal is an application that provides access to the command line. The command line is where we enter instructions with the keyboard. The mouse isn't used so there is nothing to click. The command-line instructions are all available in this lesson. You can copy and paste them to avoid making mistakes. I encourage you to type them out on your own.
I will cover how to format drives using the regular formatting tools in Windows and macOS. This is for those not sure about jumping into the command line right away.
Formatting on Mac
To use the command line on Mac we need to open the Terminal application. The application is in the Utilities folder. The Utilities folder is inside the Applications folder. Open the Utilities folder and look for the Terminal application. Launch the Terminal. The Utilities folder contains the Disk Utility too. We will use this later to format the same drive. This is for those of you unwilling to try the command line yet.

A window opens with some text. The name of your user account on the computer appears to the left of the command prompt. The command prompt is the percent symbol. The blinking square next to the prompt is the cursor. The tilde next to the percent symbol indicates you are in the account’s home directory.

Okay, let's issue a terminal command. We want a list of the contents of our home directory. Type 'ls' and press the Return key. You will get a list of the folders and files in the home directory. Some of the names you might recognize as folders. These include the Desktop, Documents, and Movies folders. Folders are directories on a computer.

Type 'ls -l' and press the Return key. The "-l" after the "ls" command is an option. The "-l" instructs the list command to provide additional information. It shows file or directory, size, modified date and time among other things.

There is a pattern of letters on the left side of the list. The first letter indicates if the item is a directory or folder. All the items in this list are directories except for humidity.py. This is a file. Type "clear" and press Return.

Clear erases the contents of the terminal window. How’s it going. Not hard, Right?!

It is important to properly identify the micro SD card. I recommend you disconnect and remove any non-essential storage devices from your computer for this step. This includes any external hard drives. I have accidentally formatted external drives myself. Do yourself a favor. Disconnect any external drive.
Type diskutil list and press the return key.
A list of any attached drives will be generated. The micro SD card we inserted will be shown with its storage capacity. The card I am using is a 16 GB card. It appears on the list as 15.9 GB. The card will have one of two possible names. It might be titled BOOT or untitled. The card is formatted using the FAT32 format. The computer drive on Mac is typically formatted using the APFS format. These are additional clues to identify the card on your machine.
There is some important information related to the micro SD card that we need before formatting. The device has what is called an identity. The identity number is shown on the left. The device identity for my card is “disk2”. The device identity on your drive might be different. Make a note of the disk identity and jot it down somewhere. You are going to need is soon.

The command instructions for formatting our micro SD card are as follows, “diskutil eraseDisk FAT32 BOOT /dev/disk2”. Press the Return key to execute the command. Don’t include the quotation marks if you are copying and pasting. Replace my disk identity with yours.

Here is what the instructions represent. We call the diskutil application to erase a disk. The disk will be formatted with the FAT32 file system. The disk name will be BOOT. The disk name needs to be in All Caps when using the FAT32 file system. The location of the disk to be formatted is in the dev directory. The identifier of the drive is disk2.
A formatting progress bar appears. The formatting process doesn’t take long. It usually takes a few seconds. If you didn’t see the formatting progress bar then go back and check the commands. You might have made a mistake in the spelling. You might have omitted one of the instructions. Always check your instructions before pressing the Return key.

When the process is complete you will see some messages. One of the lines will read "Finished erase on disk". The disk identifier will match your micros SD card.

The formatted disk will not appear on your desktop. The disk is unmounted after formatting. This means the disk volume is ejected. To see the drive you will need to unplug the drive and plug it back into the computer. Unplug the drive and put it aside for the next lesson.
Formatting on Windows
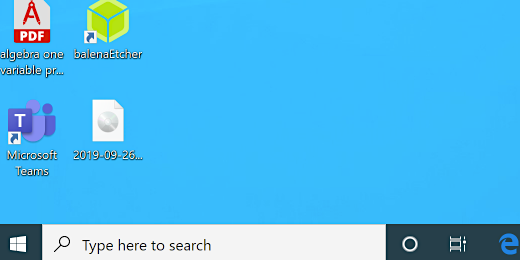
Formatting external devices on Windows has changed over the years as the Windows operating system evolves. These instructions cover Windows 10. Insert the micro SD card and adapter into one of the USB ports on your computer. Click in the search box on the Task Bar and type CMD for Command.
The Command option takes us into the command prompt. We want to run the Command Prompt as an administrator. Click the Run as administrator option.
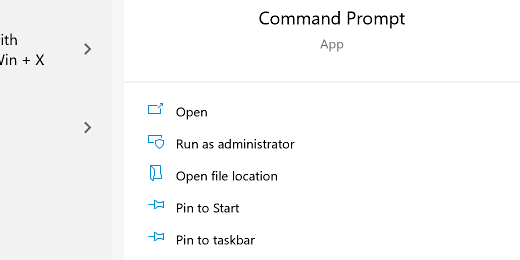
You might be asked to allow the Command Prompt to make changes on the device. Click the Yes button.

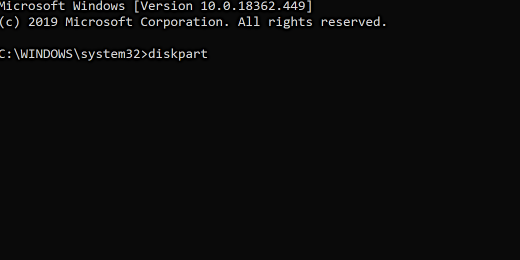
A Command Prompt window opens. This looks similar to the Terminal on MacOS.

Type the command diskpart and press the Return key.
Diskpart is a command tool used to manage drives on the computer. The Windows Command Prompt is replaced by the DISKPART prompt.

Type list volume and press the Return key. Drive volumes attached to the computer will be listed. I recommend you remove or disconnect any external drives. This reduces the chance that you might select the wrong drive.

Looking at the list we see several volumes. Each volume has a letter and label. There is a column with the file system used for each drive. We want to look for a drive that has the FAT32 file system. Windows uses the NTFS file system for its main drive and larger drives. We see that the drive with the FAT32 file system is removable. The size column shows that the drive is close to matching the size of our micro SD card. My card has a storage capacity of 16GB. The column shows 14GB. The sizes of the other drives are in no way close to matching this size. The micro SD card on my computer is assigned Volume 4. Make a note of the volume number for your SD card. Type select volume followed by the volume number for your micro SD card.

Look for a message confirming you selected the appropriate volume.
Type the command below and press Return. The card is formatted with the FAT32 file system and labeled BOOT.
Diskpart> format fs=FAT32 label=“BOOT” quick

A completed message appears at the end of the process. Remove the adapter and microSD card. Set it aside for the next lesson.
Formatting with Disk Utility
Eject and remove any external storage devices except the microSD card. Open the applications folder and then the utilities folder. Look for the Disk Utility application. Open the application. Look for an external drive. The drive will probably be titled BOOT. Click once on the drive.

Here are ways to verify you have the correct drive selected. The drive is formatted as MS-DOS FAT32. Verify the storage capacity with the card you are using. The kit includes a 32GB SD card.

Click the Erase button. Click the format selector. Select MS-DOS (FAT). Click the Erase button.

The erase process doesn’t take long at all. Click the Done button to finish. Eject the SD card and put it away for the next lesson.
Formatting on Windows
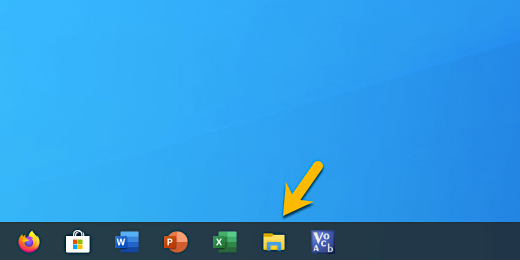
Insert the SD card into one of the USB ports on your computer. Open the File Explorer.
Look for the drive with the name BOOT. Click on the drive.

Click the Drive Tools tab. Select Format.
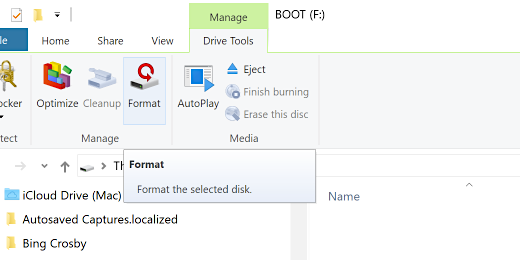
Click the File system selector. Chose the FAT32 format. Click the Start button.

Eject the SD card and put it away until the next lesson.
Formatting on Chromebook
The Chromebook is different from your typical computer that runs and OS like Mac or Windows. The Chromebook runs a version of Linux. Linux is a free open-source operating system. The operating system is based on Chromium OS. The MicroSD card is preinstalled with another Linux version based on Debian. This matters when we need to format the microSD card.
Typical drives like flash drives and microSD cards are easy to format. The card that came with your kit comes with Linux preinstalled. The card is specially formatted and partitioned into volumes. You will see what I mean in a moment. To format the drive we will use a recovery tool. This tool will be used later to create our boot media for the Raspberry Pi.
The Chromebook recovery tool is available in the Google Chrome store. Go to the Web Store by clicking the icon.

Search for the Chromebook recovery utility.

Add the utility by clicking the Add to Chrome button. Confirm the installation when you receive the message.

Find the utility in the Chromebook launcher and open it. Insert the microSD card with the USB adapter. Click the gear icon in the recovery utility. Select the option to erase recovery media.

Select the microSD card when prompted to select the recovery media. The SD card should be the only device that appears. Click the Continue button.

Click the Erase button to confirm. The process doesn’t take long. A second or two. A message appears to confirm the process is complete. Click the done button. Close the utility. Unplug the MicroSD card and set it aside for the next lesson.
There are times when an error message appears. Try the reformat process again if this happens. If it continues to happen you will need to use a different microSD card.
Why the Recovery Utility?
Normally we don't need the recovery utility to format an external drive. It made sense in this case. The formatting of the microSD card that came with your kit is different. Let's take a look. The formatting of external drives takes place in the Files utility.

The connected microSD card looks like this when inserted.
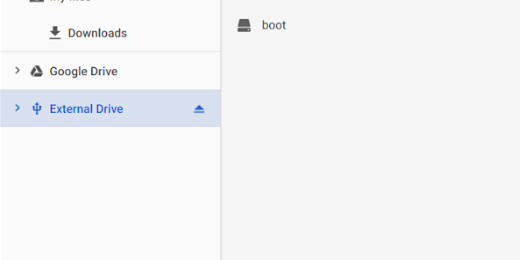
It typically looks like this.

The external drive in our media is partitioned into two volumes. Google does not have an option to configure partitions. We want to remove the partitions and have one for our system. The recovery utility allows us to format the device and remove the partitions that exist.