Space race infographic with Google Drawings

Introduction
Infographics are a good way for students to summarize information. It allows them to represent what they have learned in alternate ways. Infographics are highly visual and fact-intensive.
Infographics are useful in many segments of media; people grasp information faster when it is visual.
“It (infographic) keeps people’s interest by lending storytelling and visual element to what can be sterile research.” – Caitlin McCabe.
Good infographics require students to collect relevant information and develop some compelling text. Students present information efficiently and concisely.
Research
Research has shown that visual clues help increase the memorability of information. —W.H. Levie and R. Lentz, “Effects of Text Illustrations: A Review of Research,” Educational Communications and Technology Journal 30 (4) (1982): 195-232
Facts and figures lend authority to the text.
We learn things better visually. 90% of the information transmitted to the brain is visual, and that is processed 60,000 times faster in the brain than text.
Studies confirm the power of visuals in learning
Much of the information above came from several resources. These resources are listed on the Visual Teaching Alliance web page. The link is available below.
http://visualteachingalliance.com/
The Lesson
The infographic for this lesson is based on an overall lesson. The lesson covers the history of the space race. This was the space race that ended with the first moon landing. It began during the Cold War and Sputnik. It ended with Neil Armstrong landing on the Moon.
Use the link below to see the final product.
Space Race infographic preview
Use the link below to get the starter template. The template includes the fonts used in the lesson.
Google Drawing starter template for space race project
You don’t need to use the template. The template contains the fonts used in the lesson. The fonts are embedded in the drawing. This, in turn, adds the fonts to your font repository. This saves you and students the trouble of having to go out and find the fonts used in the lesson.

Google Drawing setup
Infographics are not limited by physical size. Most infographics are usually wider than a typical paper document. They are also much longer. Infographics are meant to be part of social media outlets like Facebook, Twitter, and especially Pinterest.
The documents are larger because they need to accommodate images and text. They also need to be visually appealing. They are much like the posters we place in our classrooms. The link below to https://easel.ly provides a nice overview of the basic dimensions for infographics on various social media. The sizes represented on the page are the standard basic measurements. I use them as the minimum requirements.
https://www.easel.ly/blog/cheat-sheet-infographic-size-dimensions/
The Template
Use the link to get a copy of the template. Click File in the menu; select page setup.

Click the page setup selector and choose Custom.

Choose Pixels for the unit measurement.

The dimensions for this infographic are 900 by 1200 pixels. Enter these values in the fields. Click the Apply button.

Graphics and text
There are lots of options for infographic backgrounds. They range from a basic color to images. Our background will have an image.
Click the Insert image selector; Search the web.

Search for space background; use the search panel on the right.

Select one of the space backgrounds —choose one you like.

Click the Insert button at the bottom of the panel.

Use the Zoom tool to zoom out to 50%.

Grab the lower right resize handle. Stretch the image so it fills the Drawing canvas. Blue alignment guides appear to inform you when the image matches the height of the canvas.

Click the Crop image tool.

Crop handles appear at the edges of the image.

Bring the right side crop handle in —toward the center of the image. A crop guide follows the resize handle. There is a Ruler at the top of the canvas. Match the guide to the edge of the ruler.

The right part of the image appears faded. This is the part of the image that will be cropped out.

Click once outside the image to exit crop mode. You can also press the ESC key on your keyboard.

Click Insert and select Word art.

Type “The Space Race” in the Word art box. Press Enter to render the word art.

Click the Zoom tool and select Fit.

Place the title toward the top of the drawing —center it.

Change the font. Use something futuristic, techno, or sci-fi. The template includes four fonts I found for you. The fonts are listed below. Use one of these or one of your own.
Expletus Sans
Nova Square
Baumans
Orbitron
Your font choice might cause the title to extend beyond the canvas. My choice of Orbitron caused the title to extend beyond the canvas. Use the resize handles to fit the title in the canvas.

Some fonts include other members of the font family. My choice of Orbitron includes type-face options from normal to Black. I chose Bold type-face.

Click the color fill button —choose white.

Word art includes a border option for the letters. Set the border color to transparent.

Keep the text selected and click the Format options button.

Place a checkmark on the Drop shadow option.

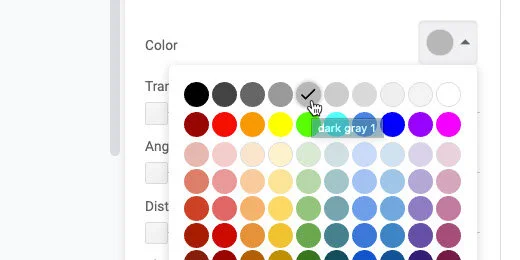
Click the disclosure chevron to reveal the drop shadow options. Move all the drop shadow sliders to the left.

Click the color selector and choose Dark gray 1.
Move the distance slider to the right. Place the slider below the letter “a” in distance. A number pops up as you move the slider. Stop when the number is 6.

This gives our title some depth.

Click the Text box tool.

Click once below the title. Click the font color tool and select white.

Select the Orbitron font or the font you chose earlier, and increase the font size to 32 points.

Type the subtitle—A brief history—into the text box.

Click once on one of the text box borders.

Click the text alignment selector and chose the center-align option.

Move the text box up and toward the center of the main title. Use the vertical and horizontal alignment guides to position the subtitle.

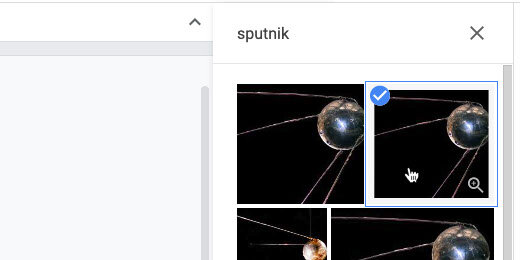
Click the image option selector and search the web.

Search for Sputnik.

There are several images. Choose one of the first two that appears. Insert the image.
We used the crop tool earlier. The crop tool doubles as a mask tool. Click the triangle next to the crop symbol.

Choose the circle tool from the shapes option.

The shape is masked by an oval.

Click the format options button. Open the Size and Rotation options.

Set the width and height to 1.5 inches.

Position the image below the subtitle.

The image becomes distorted after resizing the mask. We need to update the image. Go to the button bar; click the Replace image selector.

Search the web for the Sputnik image. This search box is different from the one we used earlier. The search for Sputnik isn’t saved in this panel. Type Sputnik again.

Select the image and click the Replace button.

The image is off-center. Double click the image.

The image has two bounding boxes. The black box is for the circle mask. The blue is to resize the image. Don’t resize the image; drag it to the left.

Get as much of the Sputnik sphere into the mask as you can. Press the ESC key to exit mask mode.

Make sure the image is still selected.

Select white from the border color palette.

Click the border thickness tool; select 8-pixels.

That took a few steps. To save time, we will use this image as a template for the others.

Select the image; go to the menu and click File. Select the Duplicate option.

Place the duplicate image below the first.

Leave the second image selected. Replace the image with one from the Web. Use the Replace image option.

Search for Yuri Gagarin.

Select an image and click Replace.

Double click the image. Move the image so Yuri Gagarin’s face is in the center of the circle.

Duplicate the image two more times. Insert images of John Glenn and Neil Armstrong into each.

Reposition the images so Neil Armstrong is on top. Place John Glenn next; Yuri Gagarin and Sputnik are next. Move the images to the left side of the canvas.

Click once on the first image. Hold the Shift key and click on each of the other images.

Click Arrange and go to the Align option. There are several align options. The left-align option aligns the images with the leftmost image. The same is true for the right align option. The images align with the rightmost image. The center align option aligns all the images below the first image based on the center of the first image. Use the left-align option.

Click Arrange again and go to the Distribute option. Choose the vertical distribution option.
This spaces the images vertically. It uses the first and last images as anchors. The rest of the images are spaced evenly between these two images. Deselect the images.

Select the rounded rectangle tool from the Shapes menu.

Draw the rounded rectangle shape to the right of Neil Armstrong.

The shape has a yellow diamond in the upper left corner. Drag that diamond shape to the right —all the way. This rounds the corners so they match the circle in our image. The shape is now a pill shape.

We need to size the rounded rectangle so the height matches the height of the Neil Armstrong image. The image of Neil Armstrong is 1.5 inches. The border around the image is 8 pixels. Each pixel is equivalent to a fraction of an inch. That’s about .08 inches for the border. The border is all the way around. So there are .16 inches of the white border on opposite sides of the image.
The height of the rounded rectangle needs to be 1.66 inches—1.5 plus .16 inches.
Open the Format options panel. Set the height of the rounded rectangle to 1.66 inches.

Move the rounded rectangle over the image of Neil Armstrong. Use the alignment guides to center and align the shape.

The shape is covering the image. Shapes and images are placed on invisible layers. The layers can be repositioned.

Click Arrange; select Send backward from the Order menu.

The rounded rectangle is behind the image. Stretch the shape to the right. Align it with the letter —e— in the title Race.

Use the color fill option; set the color fill to dark cornflower blue 1.

Return to the color fill option and choose Custom.

Move the transparency slider to the left.

Color and colors with transparency values are represented by Hex values. The value for my adjustment is shown at the top of the custom color selector. Enter this value if you want the same transparency adjustment used in my example —3c78d8cf. Adjust the transparency and click the OK button.
Transparency applied to objects is referred to as the Alpha value.

Change the border color to white.

Change the border thickness —set it to 4 pixels.

Duplicate the shape and move it down. Align it with the shape above using the center alignment guide.

The shape will appear above the image of John Glenn. Use the Arrange menu option to send the shape backward.

The shape will still be over the image after sending it backward. There are lots of shapes and images in layers. Return to the Order option and send the image backward again.
Our shape isn’t on top anymore so options to bring the shape forward or to the front are available.
You’re going to need to do this one more time for this shape. I find it useful to use the shortcut keys to arrange images. On Chromebooks and Windows computers —use the Control key plus the down arrow. Control plus the up arrow moves images forward in the layers. Mac computers use the Command key and the up or down arrow.

Duplicate the shape two more times. Place the shapes behind the two remaining images.

Click the Text box icon.

Draw a text box over the pill shape. Place the text box next to the left side of the image —stop before it reaches the rounded edge of the pill shape. Cover as much of the shape as you can.

Use white for the font color.

Use any font and font size you prefer. I used the Nunito font with 16 points.

Duplicate the text box and place it over the other shapes. Fill out the boxes with relevant information.

Replace the background
After working on the infographic you might find it necessary to make some changes. The background I chose was too distracting so I replaced it with another. To replace, click on the background image and use the Replace image option.

Soften the background
I like backgrounds but some backgrounds can be distracting. I soften backgrounds with a transparent layer. Go to the shapes tool; select the rectangle tool.

Place a small rectangle shape outside the drawing canvas.

Move the shape onto the canvas. Stretch the shape so it fills the infographic.

Click the border color and choose the transparent option.

Select dark blue 3 from the fill color palette.

Return to the color fill palette and select the Custom option.

Move the transparency slider to the center; click the Ok button.

Send the image to the back using the Order option.

The shape drops behind the background image. We need to bring the shape up one layer. Use the Order option to bring the shape forward once.

This mutes the background image slightly and helps the text stand out.

Share your infographic with the world.