Matching with Google Drawings

Fun matching assingments for students
Remember those matching exercises where you drew a line from one item to another? That is what this lesson is about. We are creating a matching exercise for students to match a list of items with another.
Use the links below to get a copy or preview of the final product.
Get a copy: https://bit.ly/2AZ1W7Y
Get a preview: https://bit.ly/2AXuqPL
This lesson begins with Google Sheets to organize our items. We then use Google Drawings to create the exercise itself. I have the link to the exercise in Google Sheets if you would like to follow along. The link is below.
Get a copy of the exercise to follow along.
Use the sheet from the link above or create a new blank Google Sheet. Title the Sheet Matching Activities lists. The list in the example has 10 words. Columns one and two contain the prefix and root word.
Using Google Sheets to organize the content is much easier than trying to do it in Drawings. There is another benefit of using Sheets.

We need to mix the prefixes and root words for the exercise. Select the prefixes.

Click Data and select Sort Range.

Click the Sort button.

Select the root words. Click Data and select Sort Range. Click the Sort button.

We have a nice mix for the exercise.

Open a new tab. Go to your Google Drive and create a Google Drawing. Title the Drawing Prefix Review Assignment. Return to the spreadsheet. Select the prefixes in column A. Copy and paste them into the drawing. Select the option to paste unlinked. Click the paste button.

Move the mouse arrow to the top of the table. Move the arrow to one side of the three dots. Look for the arrow to change to four arrows. Click and drag the table to the right.

Return to the spreadsheet. Copy the root words in column B. Paste them into the drawing. Remember to unlink the pasted contents.

Move the table with the root words to the right.

Click on the table with the prefixes. Make sure the outline of the table is visible.

I am going to be precise about the placement of my tables and content. This is to help you set up a document like mine. Click the Format options button.

Open the Position section.

Set the X and Y positions to 1.5 inches.

Open the size and rotation section. Set the width to 1.5 inches. Set the height to 5 inches.

Select the table with the root words.

Open the Position section. Set the X position to 6.5 inches. Set the Y position to 1.5 inches.

Open the size & rotation section. Set the width to 1.5 inches. Set the height to 5 inches.

Return to the table with prefixes. Select the cells in the table.

Set the font to Ariel. Change the font size to 24. Set the text to Right Justification.

Select the root words. Set the font to Ariel. Change the font size to 24.

Click the shape selector. Choose the oval tool.

Create a small circle on the canvas.

Change the width and height to .35 inches.

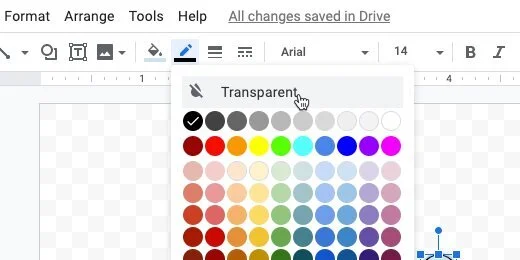
Click the border color tool. Select the transparent option.
Move the circle next to the first prefix. Use the smart guide to align the circle to the bottom cell border.

Click the line selector tool. Choose the arrow.

Move your mouse arrow to the circle. The arrow changes to a plus symbol. Move the symbol over the circle. Dots appear around the circle. These are anchor points.

Click the anchor point on the right side. Drag an arrow to the right.

Press the Esc key to release the tool.

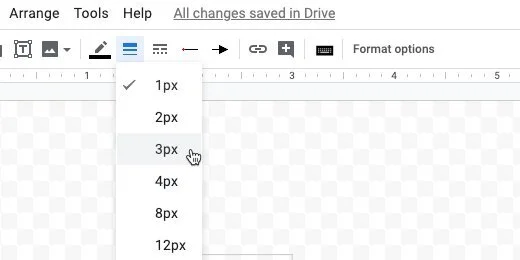
Click the line thickness selector. Choose a thickness of 3 pixels.
Click on the canvas to deselect the arrow.

Click and drag a selection around both shapes.

Click Edit and select Duplicate.

Move the duplicate shape down. Use the alignment guides to align the objects.

Keep the shape selected. Use the shortcut keys Control+D on windows or Chromebook to duplicate the shape. Use Command+D on Mac. Move the duplicate shape below the previous shape. Use the distance guides to help space the shapes evenly. Repeat this process for the remainder.

Draw a selection around all the shapes. Click Edit and select duplicate.

Move the duplicate to the right of the original. Deselect the duplicate.

Draw a selection so only the arrows are selected. Press the delete key to remove the arrows.

Draw a selection around the circles. Move the selection to the right. Move them close to the root words. Use the alignment guide above. This keeps the circles aligned with the ones on the left.

Keep the circles selected. Click the border color tool. Choose a color.

Select the fill tool and choose white.

Choose the circle for the first prefix.

Click the fill color. Choose light red berry 2.

Select the arrow.

Click the arrow color tool. Choose light red berry 2.

Go to each of the circles and arrows and choose a different color. Make sure the colors contrast.

Right-click on an empty area of the canvas. Go to the background option. Choose a neutral grey.

Select all the cells in the prefix table.

Click format and go to the Borders & lines option. Choose the Transparent option.

Repeat the process with the root words table.

Don't do this next step yet. I need to show you how to go through and reset the assignment in a moment. This is how it works. Students click on an arrow.

They click and drag the arrow point to the corresponding root word. The arrow attaches itself to one of the anchor points.

They select the next arrow and repeat the process.

The different colors identify the connections.

Add a title to the top of the assignment. Click Insert and select the Text box.

Draw a rectangular text box.

Provide a title.

Make a copy for students.

Put the word student somewhere in the new name.

Go back to the tab with the original document. This is your copy. You will use this for demonstration, in-class participation, or review. This is what I do with my documents when teaching.
Teacher master document
I use Google's Version history. Click File and go down to Version history. Select the Name Current version option.

Name the version Original and click Save.

Use the arrows to make the matching connections.

Click File and go down to version history. Select see Version history.

Find the version name Original and select it.

Click the Restore this version button.

Answer key
It’s nice to have a version for the answer key. Connect the correct answers. Create a version and name it Answer Key. Go back to version history and retrieve the original version. Retrieve the answer key by selecting it from version history.
Bonus
Turn on the option to show only named versions.
