Customize Sway with Themes

Themes and design
Presentations in Sway are theme-driven. The choice of colors and fonts is limited. This is done in part to reduce the amount of work that needs to be done to produce a polished presentation. A theme is selected for us during the creation of a sway.
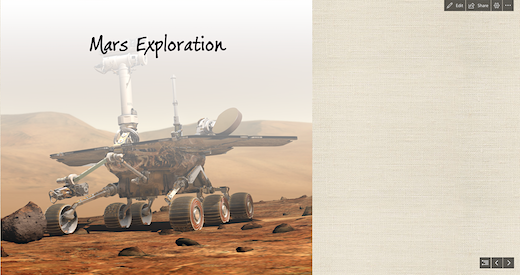
In the previous lesson, we created a presentation on the exploration of Mars. The theme for the project is based on the images. The theme for this project is nice but I would like something different. Go to the button bar and click Edit.
Click the Design tab.

Click the Styles button.

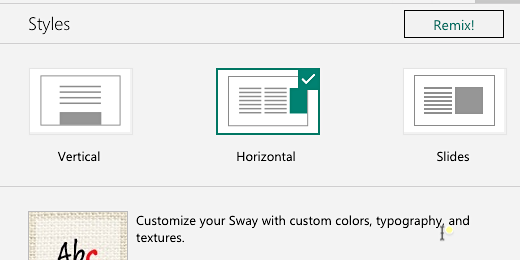
The first option in the Styles panel is the display format. This Sway is set to display the information horizontally. Users will swipe left and right to view the presentation. The vertical option displays content like a traditional web page. The Slides option presents content much like a traditional slide show. We’ll keep the horizontal option for now.
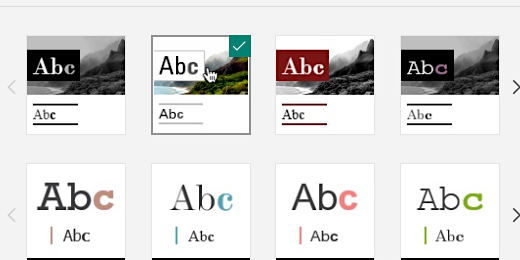
There are several thumbnail samples of themes. Each sample includes a variety of colors, styles, and fonts. Click the first theme thumbnail.

The Sway project updates to match the theme we selected. This theme changes everything to black and white. I'd like to keep the color of the images.

I’ll select the next theme thumbnail. This restores the image colors.
There are other ways to customize the presentation design. Click the Customize button.

Sway uses images in the project for a color palette. The curated palette can’t be changed. Click on one of the other image thumbnails. I’ll click on the mars rover thumbnail.

The color palette options update with suggestions. I’ll click the dark color option in the extreme right.

The image gets a little darker and the background for the text gets darker too.

That’s too dark. I’ll select a lighter option.

There are a few font options. Click the font choices selector.

Select a font option. See how it looks in the project. Select another until you find one that works.

This is looking much better. Click the Play button to preview the project.

It’s looking much better. I would like to keep the images separate. To keep them separate we need to change the presentation mode.

Click the Edit button.

Click the Back button.

Click the Slides option and preview the project.

The rover image is all by itself on the first card.

Use the navigation controls to move between cards.

The images look very nice. The text on the cards is a little too plain.

Click the Edit button. The button bar might disappear when previewing. Move the mouse pointer to the top right so it reappears. Click back on the Storyline section.

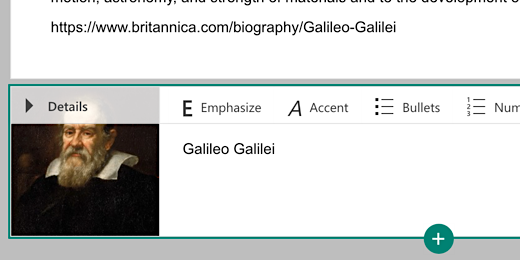
Click the triangle to reveal the contents for Galileo.

Click inside the first text card. Select all the text in the card. Click the Emphasis option.

Repeat the process for text on the next card.

Click the play preview button. Navigate to the text card. The text looks nice but it is still lacking something. Go back to edit mode.

The text cards are on their own. We can group text cards with images to add interest. Add an image card below the second text box. Add an image of Galileo to the card. Make sure to include a caption.
Click the Play preview button and navigate to the information cards. The text from the cards appears to the left of the image. The image is on the right because it is the last card in the group. To place the image on the left side we need to move the image to the top of the current group.

This looks much nicer. Look at the rest of the project. The last two cards include the video and Mars facts. The Mars facts are on their own. They didn’t group with the video card. There is an option to force group cards. Go back into edit mode. Find the Mars video card. There is a box in the lower right corner of the card. Place a check in the box.

Go to the card with the Mars facts and place a check in that box too.

A group option becomes available on the text card above the text area. Click the Group button.

The grouping places the cards to the left and right of each other. The Grid option arranges the cards from the top down then to the right. Leave the Automatic option selected. Click the Play preview button.

The video and text are placed next to each other.

Formatting text
Our text needs some formatting. Go back into edit mode. Go to the Mars facts card.

Click once in front of the first sentence and press the Return key once. This will move the text down. We will add a title to the top of the facts information. Type Mars Facts.

Highlight the Mars Facts text and click Emphasis.

Highlight the Mars Planet Profile text and emphasize it too.

Click the Play preview button. Click the Outline view button. The button is next to the navigation arrows.

Click the Mars thumbnail.

Click the right navigation arrow to get to the video.

These are some of the fundamentals. I use this for my introductory project with students. Students continue to add information from their research.