Trigger mBot code with event inputs

Using the remote
In last week’s article, mBot Robot and Basic Motion, we used a simple code block to move our robot forward. This allowed us to use the robot to learn about motion, velocity, and acceleration. By adjusting the power applied to the motors we increased or decreased the velocity. The robot travels longer or shorter distances when we adjust the duration that power is applied to the motors.
I’m sure you adjusted the code and uploaded it several times. Each time you had to take care that the robot didn’t run off the desk or table. I’m sure this proved inconvenient on more than one occasion.
We are going to place a condition in our code so the robot doesn’t begin to move as soon as we upload our code. A condition is an event that must take place before segments of code are performed.
The robot comes with a remote. It doesn’t come with a battery though. You will need to insert one. I believe it is a CRC-2032 battery. This remote will serve as our event.
Open the mBlock software and create a new project. Title the project Remote Event. Load the mBot code library. Click the Add button in the devices panel.
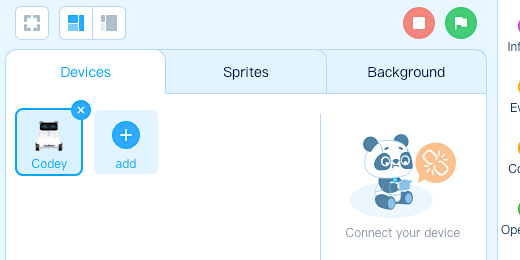
Click on the mBot icon and click the Add button to load the libraries.

Go to the Control category. Find the Forever code block. This is a loop that will repeat the steps we place inside. It will repeat these steps until we turn the robot OFF.

Place the Forever block on the canvas.

Drag the “If…then” code block and place it within the Forever loop.

Go to the Actions category. Find the move forward code block. Place the block inside the “If…then” condition.

We need to set the condition to begin the Move code. Go to the Sensor category.

Look for the “IR remote A pressed?” code block.

Place the code block inside the condition parameter. The parameter will highlight when the piece is in the right position.

The remote code block has a parameter. This parameter waits for one of the buttons on the remote to be pressed. The “A” button is automatically selected. Click the triangle next to the letter to reveal more button options.

Select the “Up” button. I recommend each student uses a different button. This will prevent the robot from receiving a signal from a stray remote.

The code is complete. Upload the code to the robot. The robot will not move as soon as the program is uploaded. Disconnect the robot and place it on a flat surface. Press the Up button on the remote. The robot will move forward for 3 seconds. Press the Up button again and the robot will move forward again for 3 seconds.
The robot repeats the process because we placed the condition inside a forever loop. The condition does not need to be placed within the Forever loop. Placing the condition in the loop makes it convenient if we want to run the code blocks again and again. Without the Forever loop we would need to turn the robot OFF then On again to use the remote to trigger the event.

Use this code block for any future projects. Place all your code within the condition block.
Using the onboard button
You might not have a remote with the robot or a battery for the remote. There is a button on the robot we will use to trigger the event. The code for the onboard button is almost identical. Click and drag the IR remote code block out of the If…then parameter.

Drag the IR remote code over the Code panel. The panel will change to a light grey color. A trashcan will appear. Release the code block.

Look for the “When on-board button pressed” code block. It is in the Sensor category.

Place the code block in the parameter for the condition block. The code block has a parameter. The parameter is set to the button pressed. This is what we want.

The code is all set. Upload this to the robot. Press the button on the mBot. Using a button is a good option if you don’t want a remote from another robot to trigger the event on your robot.
Combine conditions
The IR remote and button can both be used. We will place both conditions in one code block. To use both conditions we need to use an operator. We are going to use a Boolean operator. There are three Boolean operators. They are AND, OR, and NOT. They are often used to connect and define relationships.
Remove the “When on-board button pressed” code and leave it on the canvas.

Go to the Operators category. Find the “or” operator.

Place the OR operator in the "If…Then" condition parameter. The OR operator has two parameters. The code for the button will be on one side. The code for the IR remote will be on the other. One condition or the other must be met for the move action to take place.

Place the “when on-board button pressed” code on the right side of the OR operator. It doesn’t make a difference on which side it is placed. The OR operator will work the same.

Find the IR remote code in the Sensor category. Place it on the left side of the OR operator. Choose a button to trigger the event.

Upload the program to the robot. Try the remote or the button. One of them will start the robot moving.