Make a sphere with Google Drawings

Introduction
Geometry isn't only about 2D shapes and angles. It includes 3D shapes. Representing 3D shapes on 2D surfaces like screens and paper is difficult. We can use orthographic projection to represent 3D objects in 2D space. There are different methods for representing 3D objects.
One method used in technical drawings is isometric projection. Another familiar perspective is a Cabinet graphical projection. Cubes are often represented using this projection. Artists often use perspective projections. This is common with buildings and landscapes. There is a family of graphical projections. The images below represent some of these projection groups.
Use the links below to get a copy of this final product or to see a preview.
See a preview of the final product
Sphere
Google Drawings has some 3D shapes. These shapes include the cylinder and cube. It does not have a sphere or a cone. We will create a sphere.
Create a folder to store the geometric shapes. I have my 3D shapes folder within a geometry folder. That folder is within an assignment folder. Go into that folder to create the sphere.
Go to your Google Drive and open the folder where the Sphere will be saved. Create a new drawing document. Set the document name to Sphere. Click File and go to the page setup option.

Select the custom option from the page setup selector. Set the width and height to 10-inches. Click the apply button.

Click the shapes selector. Choose the oval tool.

Drag out a circle shape. Press the Shift key on your keyboard to constrain the shape to a circle. The circle doesn’t have to be large.

Go to the button bar and click Format options. Click the Position section. Set the X and Y position values to 1-inch.

Select the size & position section. Set the width and height values to 8-inches.

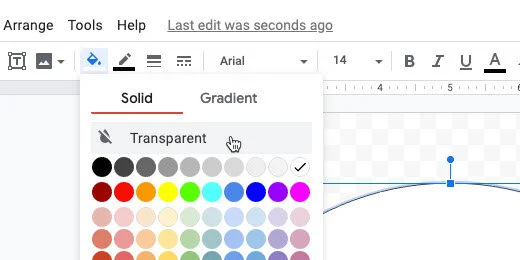
Use the shape color fill tool and choose the Transparent option.
Select the arc tool from the shapes selector.

Draw a small arc shape outside the circle area. Press the Shift key to create a symmetrical arc.

Use one of the yellow anchor points to trace a circle. Don’t complete the circle. Leave a small gap.

Move the arc shape to the top center of the circle. Use the alignment guides to help align the shape.

Drag the bottom resize handle down.

Release the shape when it touches the opposite end of the circle.

One of the yellow anchor dots should be somewhere within the circle. Click and drag the yellow dot down to the bottom of the circle.

The yellow dot should be touching the bottom of the circle.

The other yellow dot should be touching the top of the circle.

Open the size & rotation option. Set the width of the arc to 3-inches. Make sure the height is set to 8-inches.

Changing the size moves the arc slightly off-center. Drag the arc toward the center of the circle. Use the alignment guides.

Change the arc line color to a light gray.

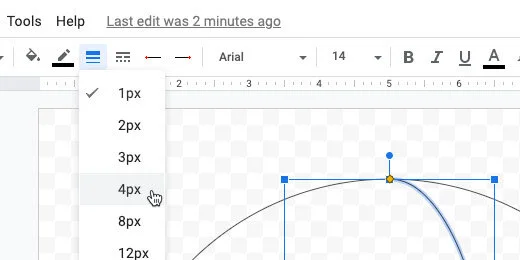
Change the line thickness to 4 pixels.
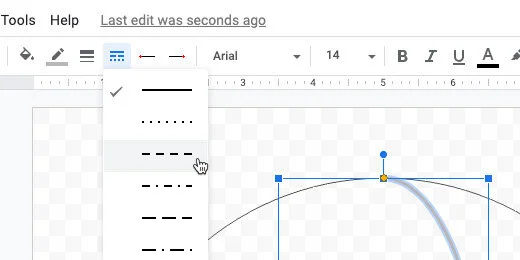
Set the line style to dashed.
Click Edit and select Duplicate.

Click Arrange and go to the Rotate option. Select Flip horizontally.

Drag the duplicate shape and center it within the circle.

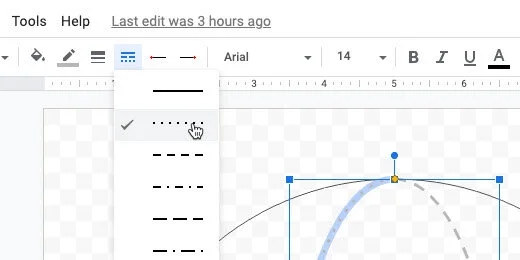
Change the line style. Use the dotted line style.
The next step is optional. Try it out so see if is something you want for your sphere.
Select the circle.

Click the color fill selector. Switch to the gradient section.
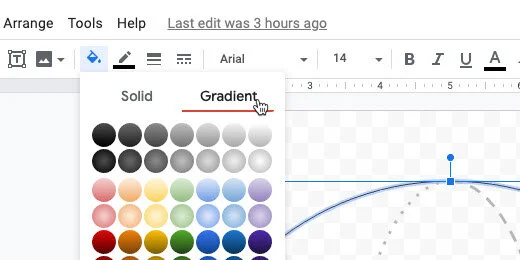
Choose a gradient from the fourth row.

You don’t have to give the sphere a gradient color. I think it adds some depth. The next step creates the diameter and radius lines.
Select the line tool. Draw a horizontal line outside the circle. Hold the Shift key to keep the line horizontal.

Change the line thickness to 3 pixels. Change the line style to dashed. Press the ESC key to deselect the line.
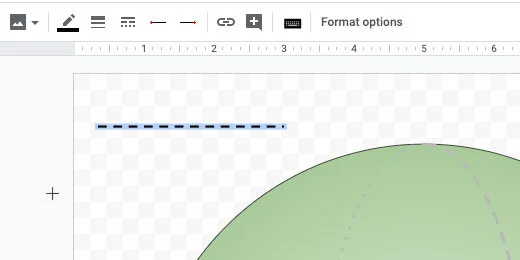
Move the line to the center of the circle. Use the alignment guides.

Drag the right anchor to the edge of the circle. Connect it to the anchor that appears at the edge. Repeat the process for the other end of the line.

We are going to duplicate this line. Click Edit and select Duplicate. Drag the right endpoint up. Connect it to one of the connectors on the circle above the diameter line.

Drag the other end of the line. Connect it to the center connector on the diameter line.

Click the Textbook button. Click outside the sphere. Type the capital letter D in the box. Resize the textbook. Place the letter where the radius line meets the diameter line.
Create another text box. Type a lower case letter r. Resize the box and position it next to the radius line.
