Angles with Google Drawings

Introduction
In this lesson, you will learn how to create a variety of angles with Google Drawings. Use the angles to teach and assess student knowledge of various angles. We will create a right, acute, and obtuse angles.
The angles are available for you to copy and use without going through the lesson. I do encourage you to go through the lesson to learn a few skills. The links are available below.
right angle
acute angle
obtuse angle
Vocabulary
Geometry and angles have their own set of vocabulary. Here are the terms used in this lesson.
Vertex is the point where line segments meet at an angle.
An arm is a term used for the lines of an angle.
An angle is where the arms meet in a vertex.
An initial side is an arm that lies flat on the x-axis.
The Terminal side is the arm that is opposite the initial side.
Theta is the symbol used to identify angles.
Preparing the Drawing
Open Google Drive. Make sure to create a folder to store the drawings. Mine is stored inside an assignment folder. This folder has a math folder. Inside that folder, I have a geometry folder. In that folder, I have a folder for the angle drawings. I also have folders for my 2D and 3D shapes.

Click the New button to create the Drawing document.

Set the name of the drawing to a 90-degree angle.

Click File and select Page Setup. Click the page selector and choose Custom. Set the page size to 10 by 10 inches. Click the Apply button.

Select the Line segment tool from the line selector.

Draw a horizontal line on the canvas. Press and hold the Shift key to create a perfect horizontal line.

Click the Line weight selector. Choose the 4 pixels.

Press the ESC key to exit the line segment tool. Make sure the line is still selected. Click Edit and select the Duplicate option.

Click the Format options button.

Open the Size and Rotation section in the format options panel. Click the Rotate 90-degree button.

Drag the vertical line to the left edge of the horizontal line. Use the red alignment guides to position the top of the vertical line with the left side of the horizontal line. The lines need to be at right angles to each other.

Drag the horizontal line to the bottom. Align it to the right.

Draw a selection around both lines. Click Arrange and select Group.

Go to the Size & Rotation section. Change the height and width to 8 inches.

Open the Position section. Set the position for X and Y to 1-inch.

Click the Text-box tool.

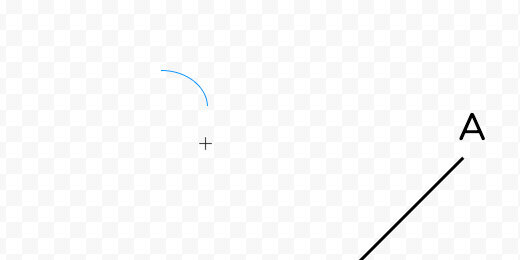
Click once in a space above the angle. Type the letter A. Change the font size to 36 points. Resize the text box. Place it above the vertical line.

Click Edit and select Duplicate. Move the duplicate letter to the bottom. Change the letter to B.

Duplicate the text box. Place it to the right of the horizontal line. Change the letter to C. The letters are used to reference the angle in questions.

We will use this angle to create other angles.
Acute angle
Click File and select Make a copy.

Change the name of the drawing to an Acute angle. Click the OK button. Select the vertical line. Click the Format options button. Open the Size & Rotation section. Click in the angle field. Change the angle to 45-degrees.

Drag the rotated line to the horizontal line. Align the ends of each line. Use the alignment guides.

Move the letter A. Place it above the angled line. Drag a selection around all the objects. Click Arrange and select Group.
Click the line and drag the shape toward the center. Use the alignment guides to center the angle vertically and horizontally.

This will serve as our template for future acute angles. Before creating more angles we need to take care of a couple more items.
Click the shapes selector. Choose the arc tool.

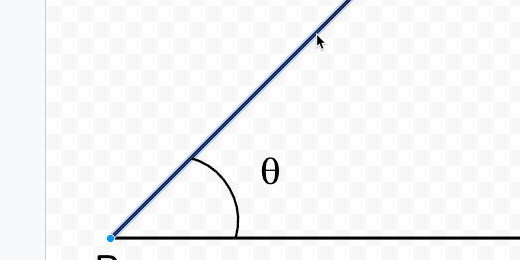
Draw an arc on the canvas. Hold the Shift key to create a symmetrical arc. Don’t make the arc too big.
Move the arc down to the angle.

Open the Formatting options panel. Rotate the arc 15-degrees.

Move the arc so the endpoints touch the arms of the angle. Change the arc line thickness to 3 pixels.

Theta symbol
We need a symbol for the angle. This symbol is Theta. Open another tab and go to https://math.typeit.org. Click on the Theta symbol. It looks like the number zero with a horizontal line through it. The symbol is placed in the text area.

Select the symbol in the text area and copy it. Return to the drawing tab. Paste the symbol. A text box is created to hold the Theta symbol.

Set the font size to 36 points. Resize the text box to surround the Theta symbol. Move the text box. Place it within the angle.

Obtuse angles
Make a copy of the acute angle. Set the name of the copy to an obtuse angle. Select the angle. Click Arrange and select Ungroup. Deselect the shape. Select the diagonal line.
Open the Format options panel. Click the Flip horizontal button.

Move the inverted diagonal line to the left. Align the endpoint with the horizontal line.

Drag the arc closer to the vertex. Drag the top arc endpoint to connect with the terminal side.

We are going to select the arms and the arc. Hold the Shift key and click on each arm.

Click Arrange and select Group. Go to the Resize & Rotation panel. Set the width to 8-inches. Set the height to 4-inches. Move the obtuse angle to the center of the canvas. Reposition the letters and the Theta symbol.
